The “Sign in with Okta” feature allows users to access Omniconvert using their Okta accounts. To make things work you have to configure your Okta org and connect it to the Omniconvert org. It can be done using the default Org2Org Okta integration.
Admin tasks
- Add and configure Org2Org Okta integration
- Set up Org2Org API access
- Configure Org2Org provisioning
- Assign Users/Groups
Add and configure Org2Org Okta integration
Get the required information from the Omniconvert team. You’ll need a base URL (Omniconvert Okta Hub URL), Hub ACS URL, and Audience URI.
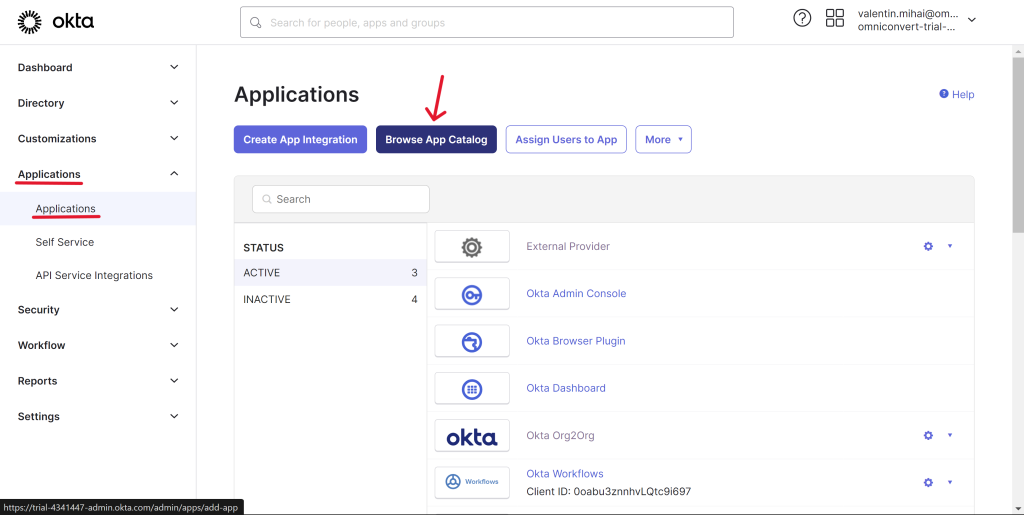
Go to your Okta Admin Panel > Applications > Applications > Browse App Catalog.
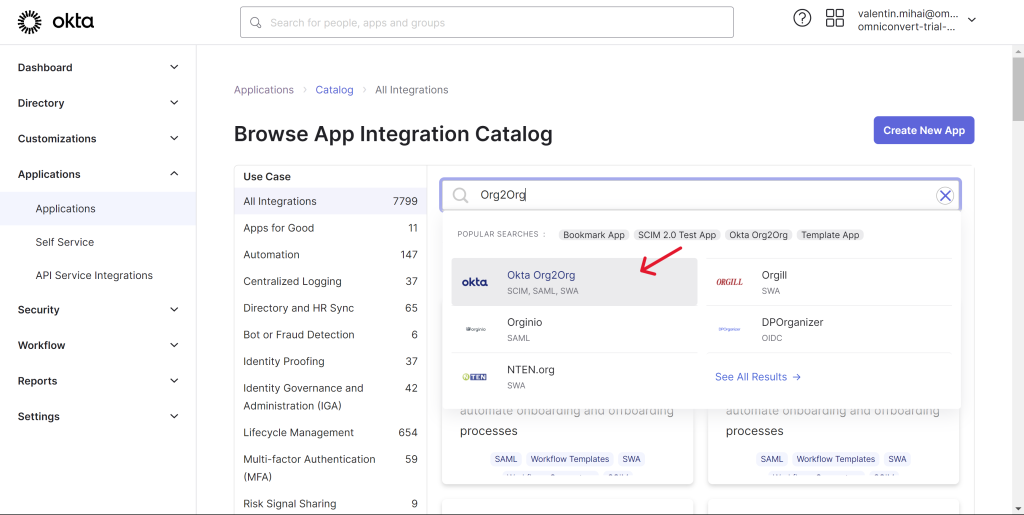
Search for the Org2Org app integration.
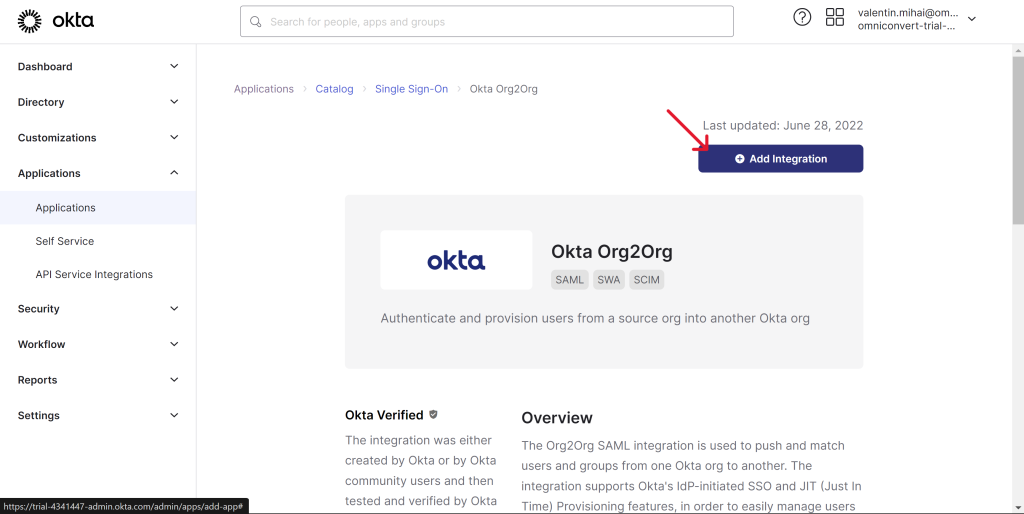
Go to the App Integration and click the Add Integration button.
Now you should be redirected to the integration setup form. Fill out the basic information.
Set the integration name (we recommend using verbose labels) and base URL to the Hub Okta domain (this value must be provided by the Omniconvert team). Click Next.

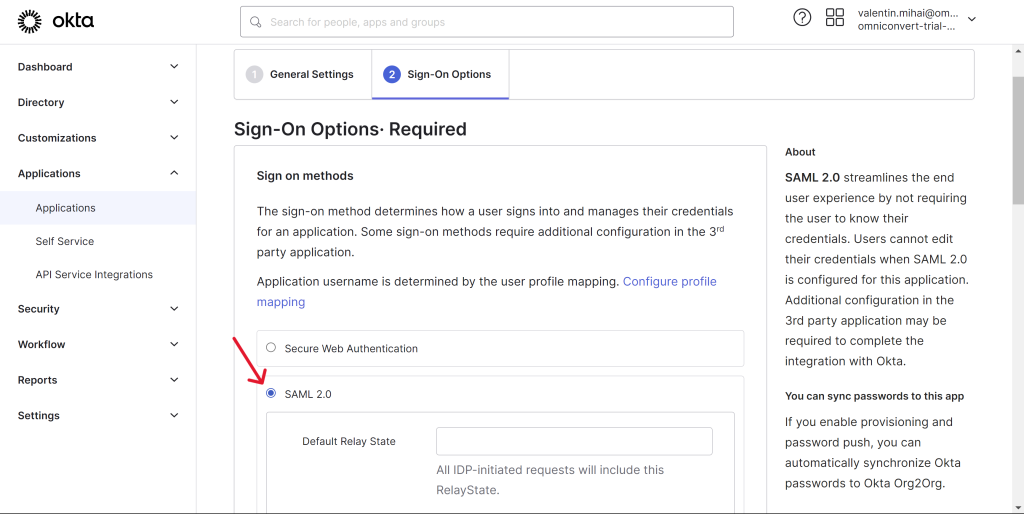
Choose the “SAML 2.0” in the “Sign on methods” section.
Scroll down to the “Advanced Sign-on Settings”. Set SAML parameters:
- set the “Hub ACS URL” (this value must be provided by the Omniconvert team, see step #1)
- set the “Audience URI” (this value must be provided by the Omniconvert team, see step #1)
Click Done.

Set up Org2Org API access
After you’ve successfully added Org2Org integration you have to configure the Provisioning. To start up it you have to set up the API access.
Get the API access token from the Omniconvert team.
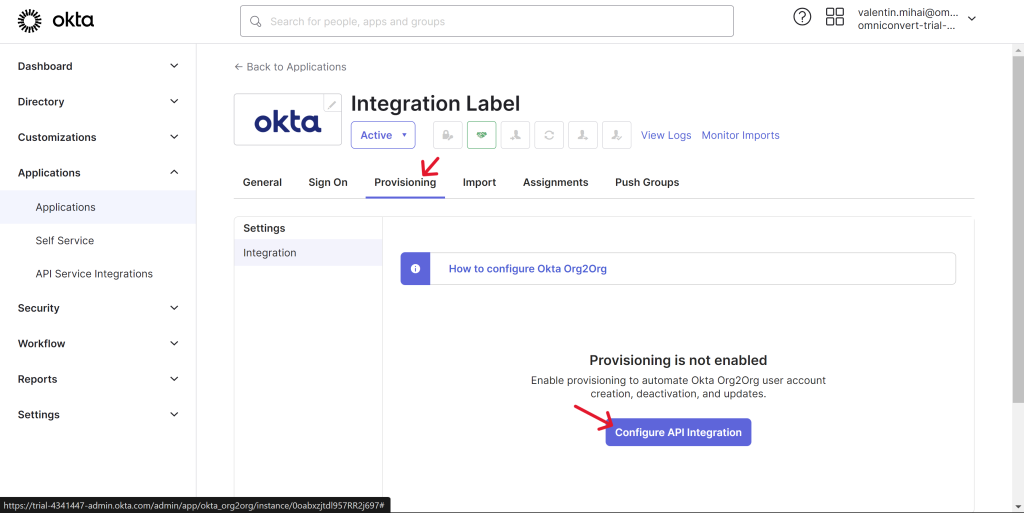
Go to your Org2Org integration app and open the Provisioning tab. Click the “Configure API Integration” button.
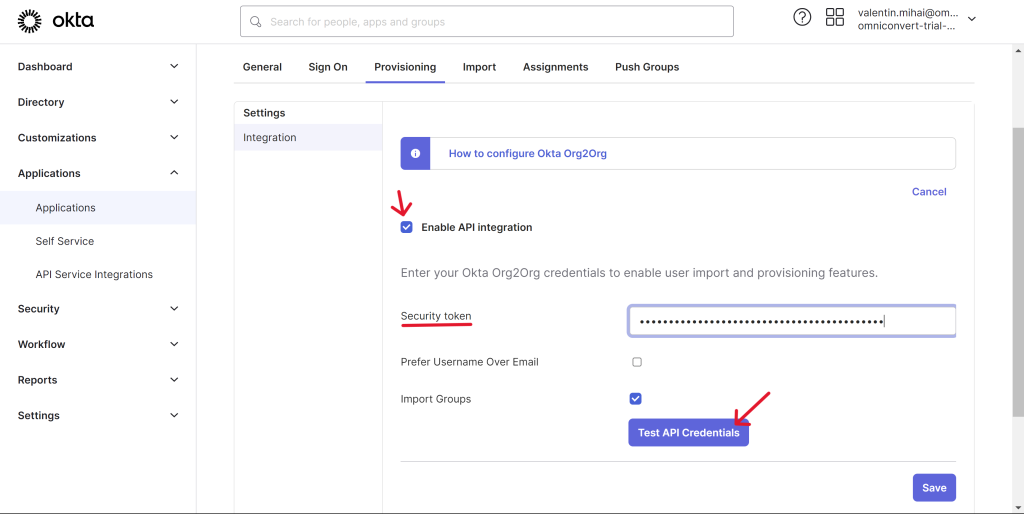
Pick the “Enable API integration” option . Insert the “Security Token” (this value must be provided by the Omniconvert team). Click the “Test API Credentials” button.
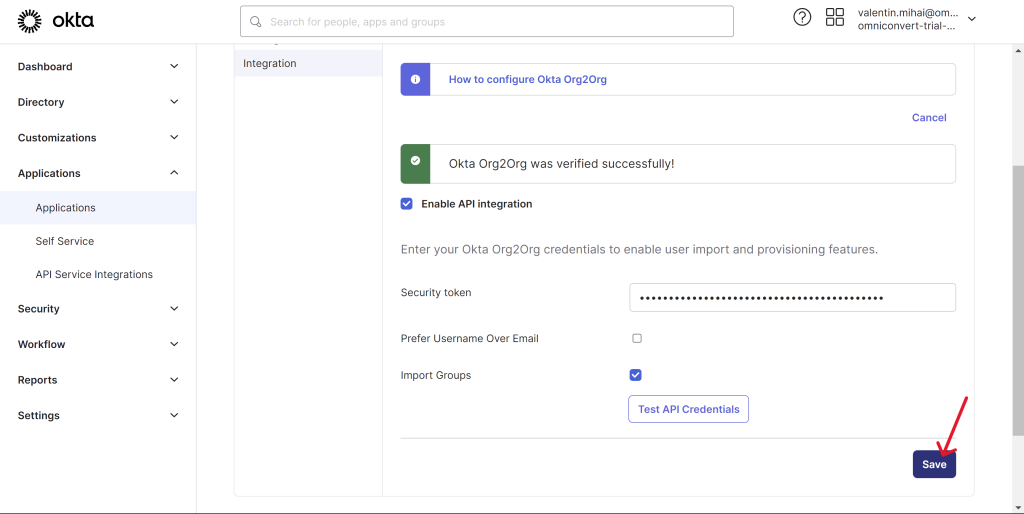
You must see the “Okta Org2Org was verified successfully!” alert.

Click Save.
Configure Org2Org provisioning
Once the API connection is ready you can configure Identities provisioning from your Okta org to the Omniconvert app.
Go to your Org2Org integration app. Navigate to the Provisioning tab > To App section. Click the “Edit” button.
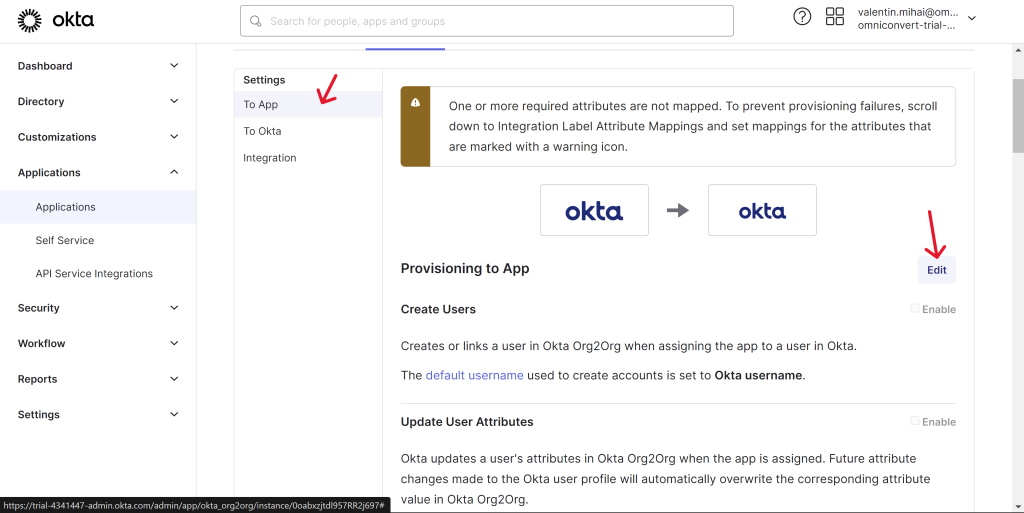
Enable “Create Users”, “Update User Attributes”, and “Deactivate Users” options . Enable the “Sync Password” option and choose “Password type > Sync Okta Password”.

Click Save.

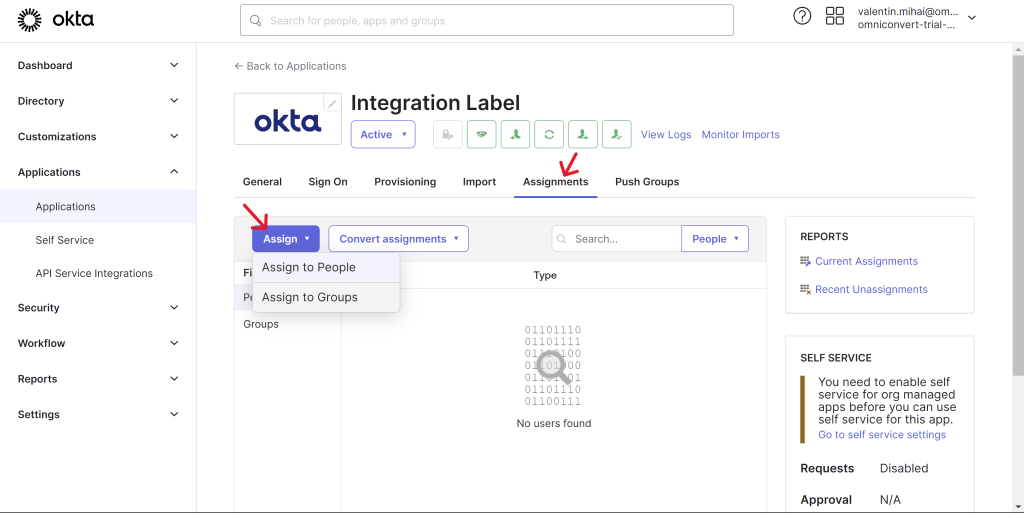
Assign Users/Groups
The last thing to do is to grant access to your users and assign them to the Org2Org integration app.
Go to your Org2Org integration app. Open the “Assignments” tab. Click on the “Assign” button:
- use the “Assign to People” option to assign a specific user;
- use the “Assign to Groups” option to assign user groups.
Choose a User/Group, click the “Assign” button, and confirm everything.
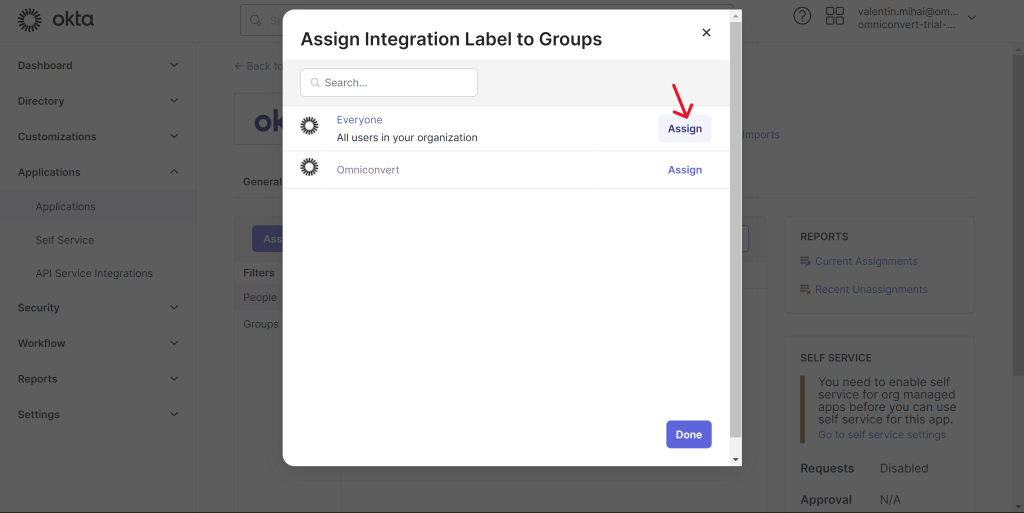
Click Done.

That’s it! Now you have a ready-to-use Org2Org integration. Every assigned user can use his Okta account to access Omniconvert apps.
*Sometimes, before accessing the target apps in Omniconvert Okta users must sign in to their Okta accounts to sync new access rights.