There are two methods to integrate Omniconvert Explore with your Shopify store. You can choose the one that best fits your needs, but please review the requirements below before starting.
Which method should you choose?
Method 1: Installing the Shopify App (Automatic)
- Required if you plan to use Shopify Price Testing.
- Automatically installs the tracking code in Asynchronous mode.
- Automatically installs the Custom Pixel, which tracks Sale conversions.
Important: Currently the app does not have support for multi-currency websites, so if your store is not single-currency, please use the Manual integration.
Method 2: Direct Integration (Manual)
- Involves pasting code directly into your theme.liquid.
- Allows for Synchronous implementation (recommended for A/B testing to avoid the flickering effect).
- Requires manual creation of the Custom Pixel, which tracks the Sale conversions.
If you want to use Method 1 and install the app, but would still prefer using a Synchronous version of the code, that can be done via a workaround which will be addressed as well in this documentation.
If you are unfamiliar with the difference between Synchronous and Asynchronous, you can find more information here.
Method 1: Install the Shopify App
To start, you need to install our Shopify application. This application will perform all the necessary initial setup actions for you.
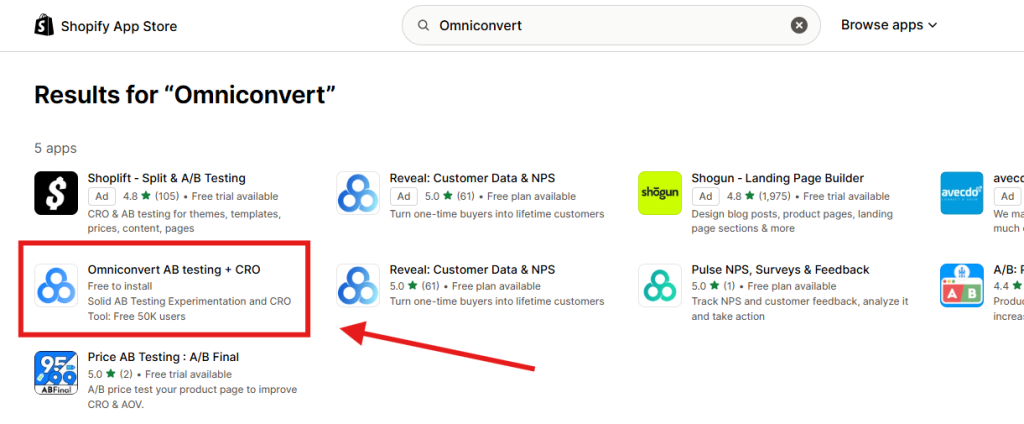
1. Go to the Shopify App store and look for Omniconvert AB Testing + CRO, or simply click here to go directly to our app page.
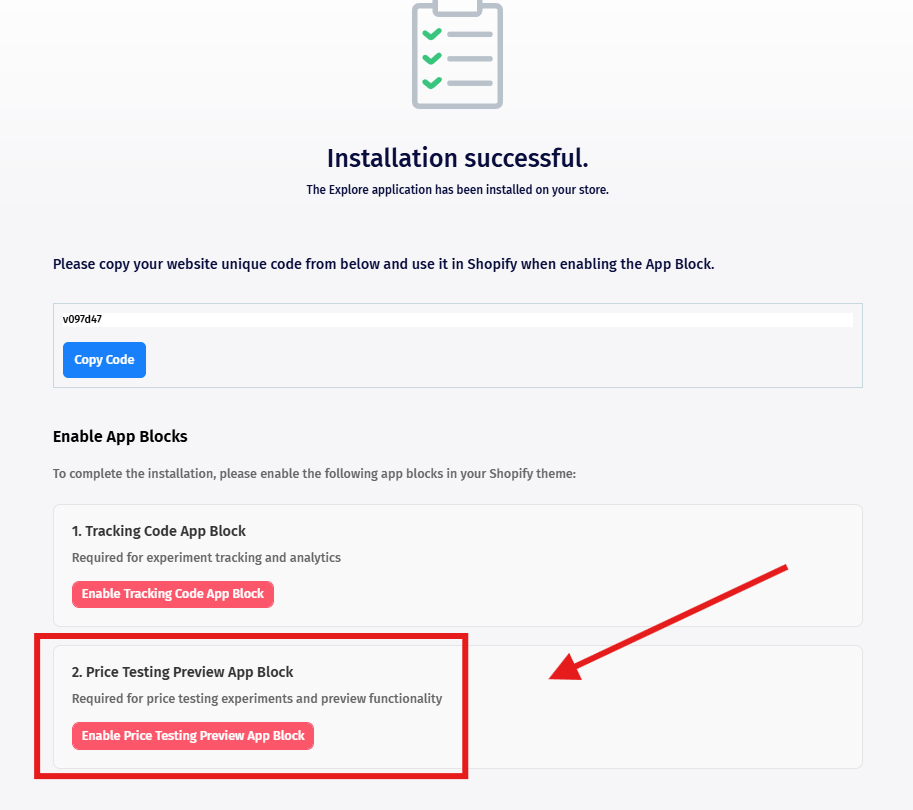
Once the installation is finished, you will be presented with an Installation successful screen, indicating that the app is ready for use.
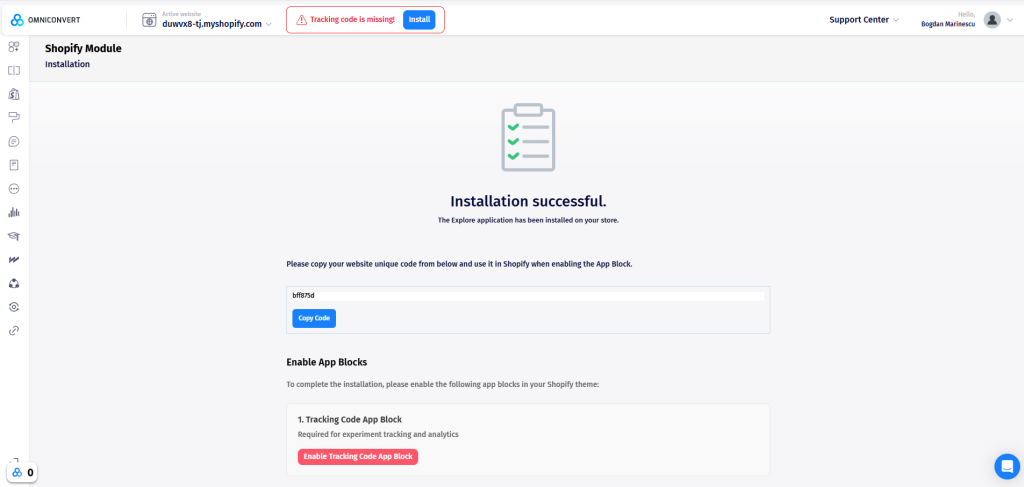
The most crucial mandatory step is the tracking code installation. This enables Omniconvert to work with the website, apply experiments, record data, etc.
2. All you need to do is to copy the code above:

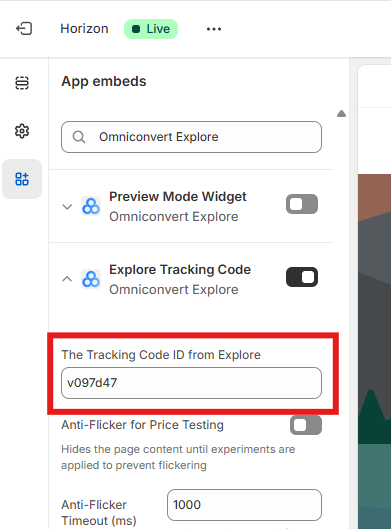
3. Press on the Enable Tracking Code App Block button:
4. This will take you to your Shopify store, where you need to paste the code copied previously and make sure Explore Tracking Code is toggled on.
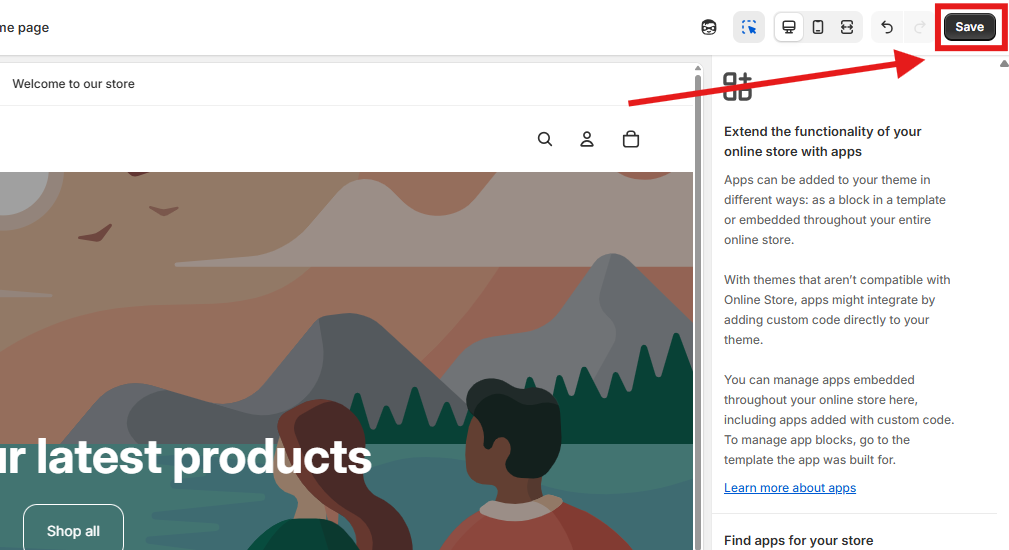
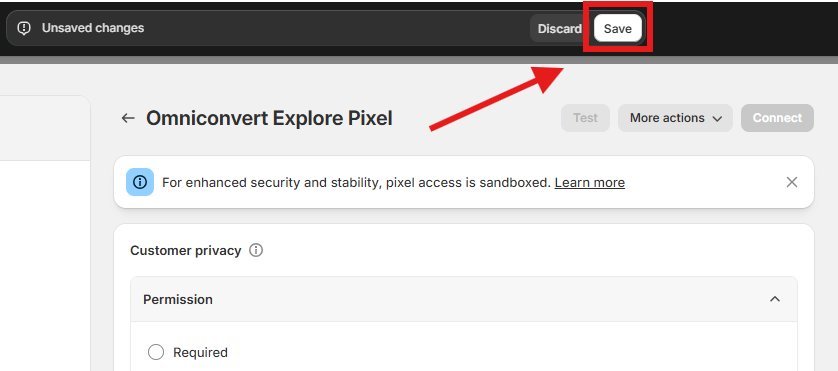
5. Once you are done with enabling these, just press Save on the top right corner.
6. The next step is optional, but if you are planning on running Price Testing experiments, this feature is highly recommended as it enables Preview Mode. Before releasing an experiment with price tests, you need to test it thoroughly.
7. The App In Bed feature will show up on your website, letting you know that you are in “test mode”.
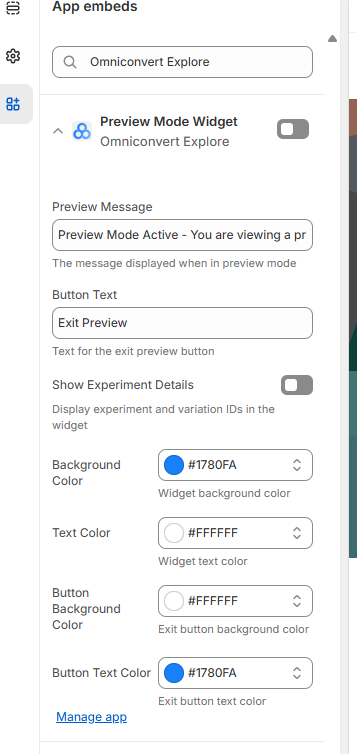
8. Once you are done with enabling it, just press Save on the top right corner, like before.
All apps on Shopify are required to run in Asynchronous, but if you want to install the app, but still use the Synchronous version of the tracking code, there is a workaround for that. You need to disable the AppEmbed and add the tracking code manually.
Method 2: Direct Integration
Step 1. Integrating the tracking code
1. To install the tracking code, you need to LOG IN the Omniconvert Explore application and click on the Install button in the header area:

Or lower, on the Click here link:

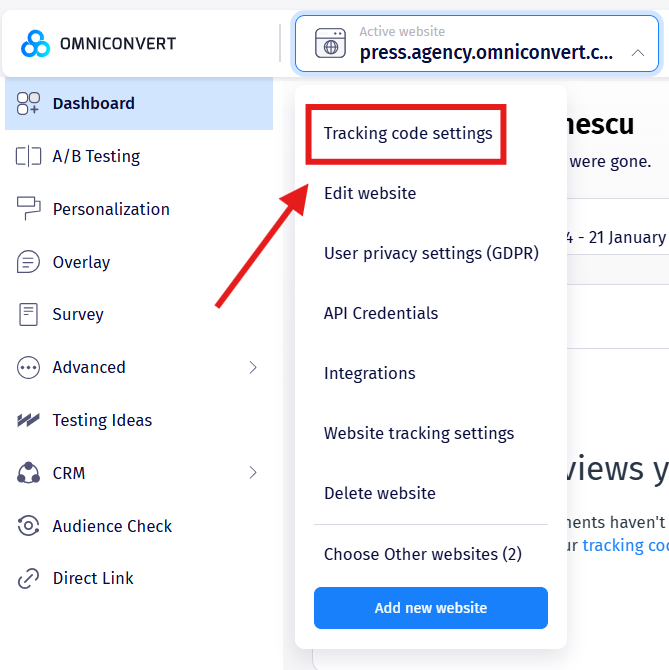
Another way to reach the tracking code page is by clicking on the website’s name > Tracking code settings.

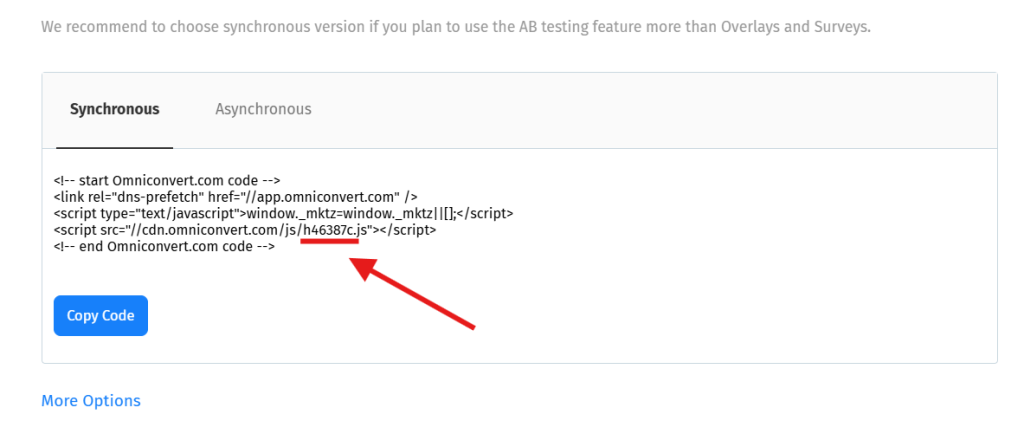
2. After doing so, you will be prompted with a new window from where you must simply copy the custom code generated especially for your website.
After you copy the code, you must go to your Shopify store, where we will past this code in our header.liquid.
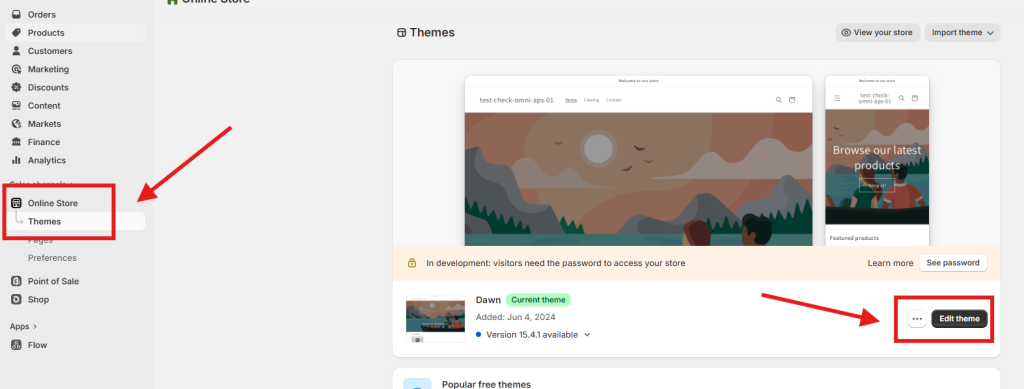
3. To do this, first go to Themes, found under Online Store. Once that is selected, press on Edit theme.
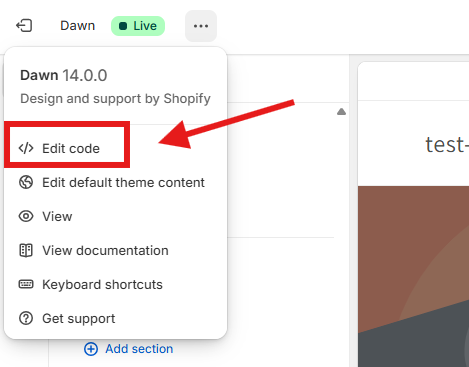
4. Click on the three dots and select Edit Code.
5. Next up, we need to search for either header.liquid or head.liquid, depending on your theme.
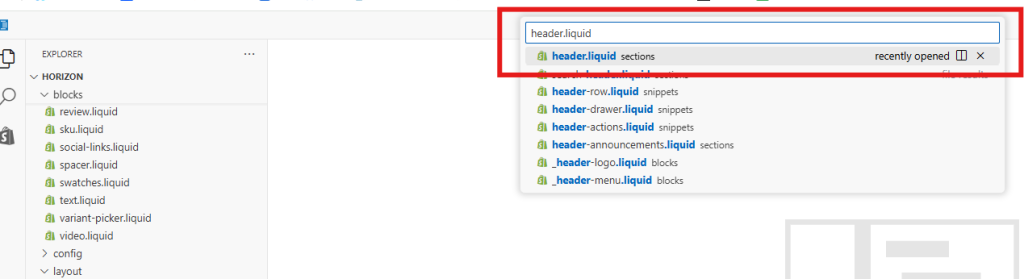
6. Choose the correct file and in this page you must insert the Omniconvert code immediately at the top.
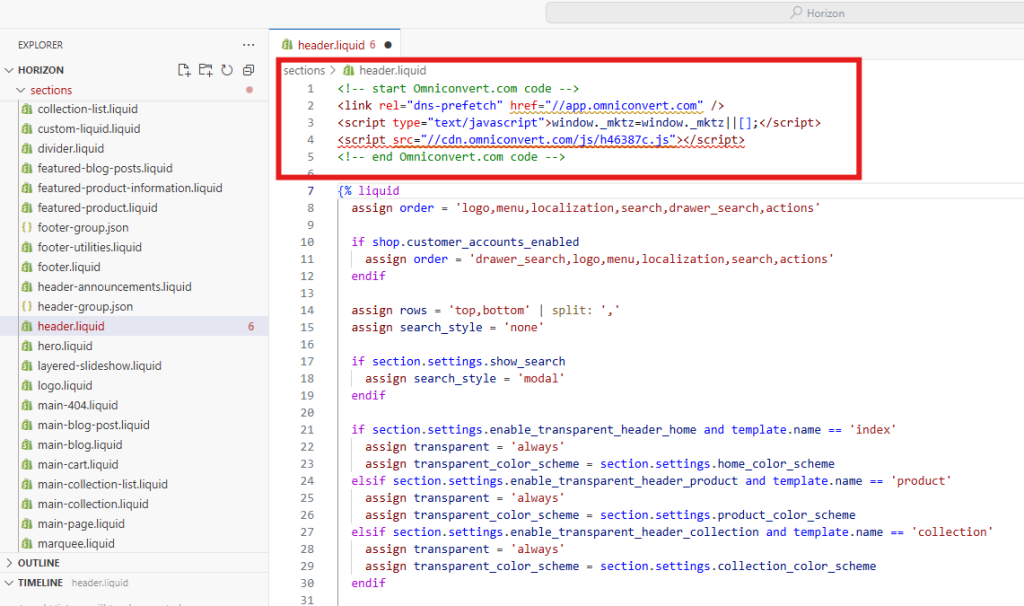
7. Once that is done, press Save.
Step 2. Installing the Custom Pixel
Using Omniconvert to collect data from the Checkout page will require the creation of a custom pixel, but making one is simple.
1. Go to Settings, and select the Customer events option. From here press on the Add custom pixel button.
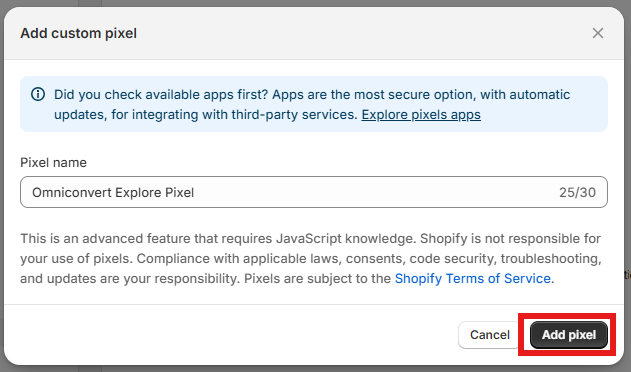
2. Choose a name for the custom pixel. In this case, we will go with Omniconvert Explore Pixel. Then press the Add pixel button.
3. Set up your customer privacy. The recommended Customer Privacy Settings of the pixel are:
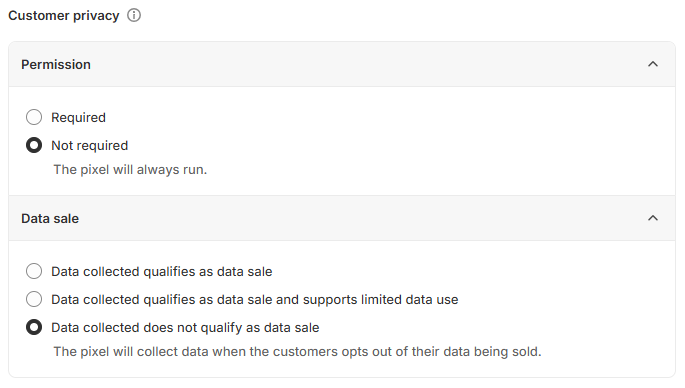
If the laws of the country of the ecommerce’s residence allows it, we recommend to have the Not required value for the Permission box, otherwise any of the other values can be used, but we won’t be able to track sales for users who do not grant us permission.
It is recommended to check the box labeled Data collected does not qualify as a data sale in the Data Sale section.
4. Copy the following code and paste it into your pixel and replace {YOUR_ID} with your website’s unique identifier from the Explore Dashboard.
const push = function (event, tries) {
    if (tries === 0) {return;}
    try {
        _mktz.push(['_Goal', 'sale', event.data?.checkout?.totalPrice?.amount, {transaction: event.data?.checkout?.order?.id}]);
    } catch (e) {
        setTimeout(push, 500, [event, tries - 1]);
    }
}
analytics.subscribe("checkout_completed", (event) => {
    window._mktz=window._mktz||[];
    const mktzScript = document.createElement('script');
    mktzScript.setAttribute('src', 'https://cdn.omniconvert.com/js/{YOUR_ID}.js?pixelMode=1');
    mktzScript.async = false;
    document.head.appendChild(mktzScript);

    push(event, 20);
});
In order to retrieve your website’s unique identifier go to the Explore Dashboard and by pressing on your website to open the dropdown, select Tracking code settings.
Here you will find the unique identifier which correlates to your website.
5. Once you inserted the code which contains your website’s identifier, you need to press the Save button first, otherwise you will be unable to connect your custom pixel.
6. Then press the Connect button at the bottom of the page. The pixel needs to be connected, otherwise your sale events won’t be sent to Explore.
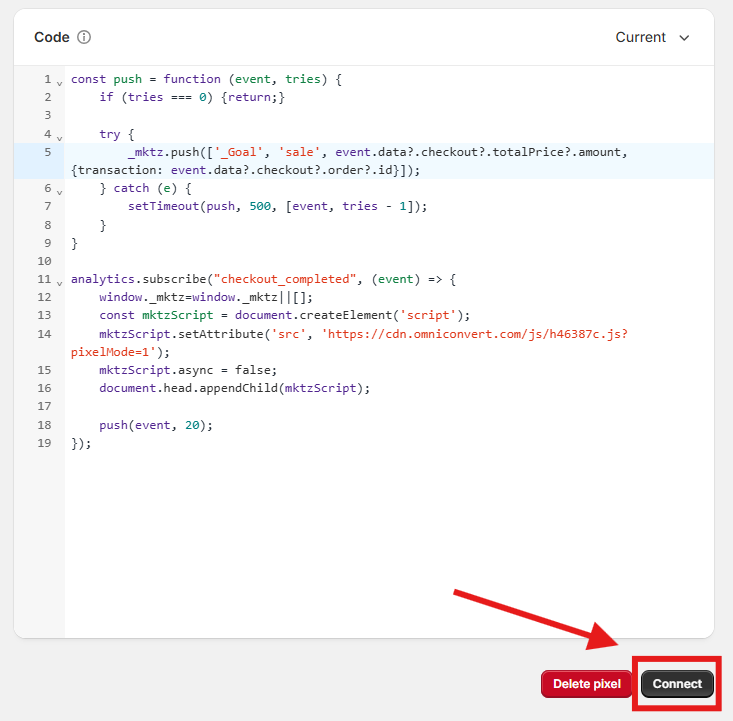
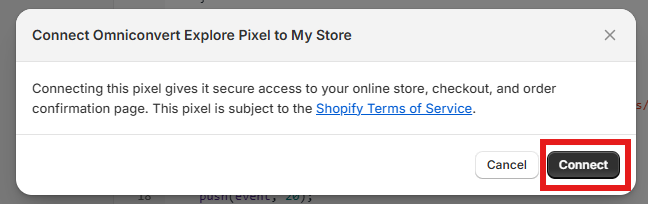
7. A pop up will open where you will have to confirm your action. Press Connect again and that is all, your custom pixel is set up.
Please make sure to use your own website unique identifier, not the one from the examples above, as using the example will lead to your custom pixel not working.