Step 1. From the main left menu choose the Survey option.

Step 2. Enter a title for the survey (this will be visible only in the platform/dashboard and it will help you differentiate the experiments / find them easily).

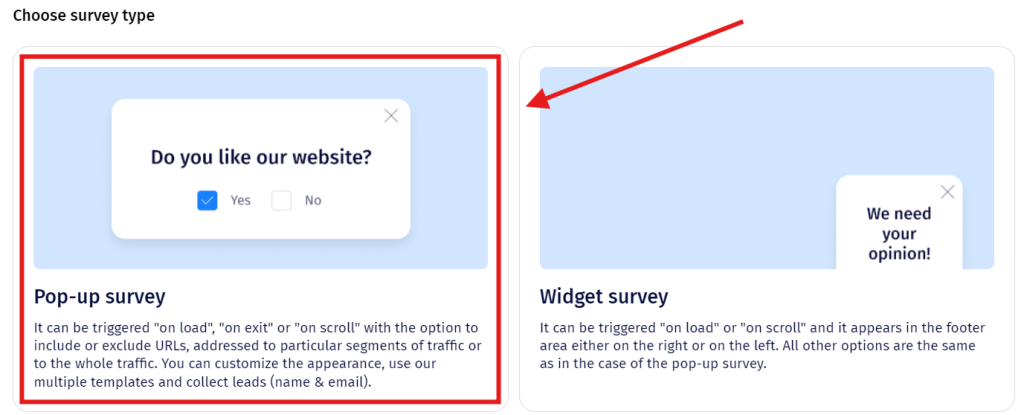
Step 3. Select Pop-up survey option.
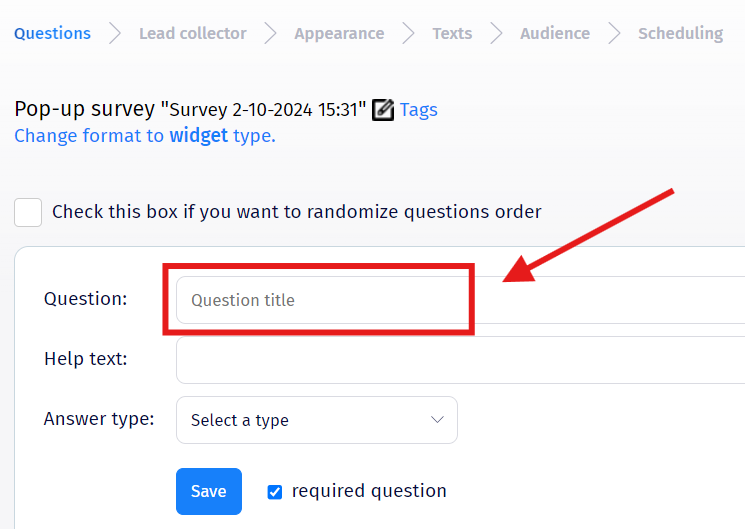
Step 4. Leave the Questions tab blank (do not add any questions)
Step 5. Go to Lead collector tab and enable it.

Step 6. Once it is enabled, add a header to it into the Lead Collector Header (optional). You can add an image or a banner to attract the attention of your visitors, so they will leave their information.

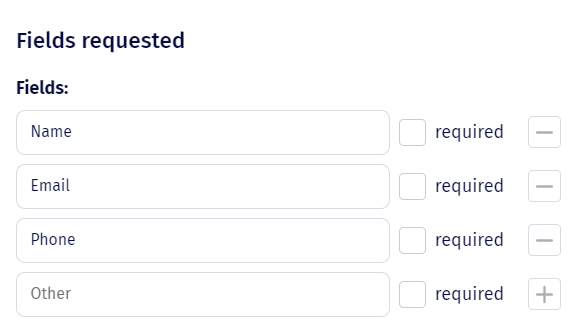
Step 7. Scroll down and select the Fields requested that you want the viewer to complete. You can also mark the as mandatory, if needed.
You can choose to receive the leads by email. In this case, we wanted to receive the leads to our own email inbox, so we entered two email addresses separated by commas.
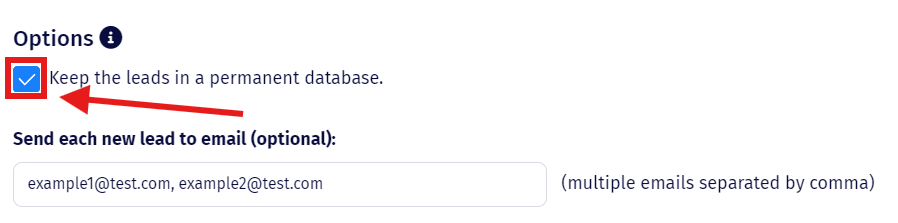
Above the Send each new lead to email field you will find the Keep the leads in a permanent database checkbox that will set the platform to delete each lead after it has been sent to you if unselected.
Step 8. You can also choose to send leads to your email service provider. For now, we offer integration with Mailchimp, CampaignMonitor, GetResponse, Freshmail and Zapier.

Step 9. Go to the Appearance tab and select as a Triggering method the on exit one.

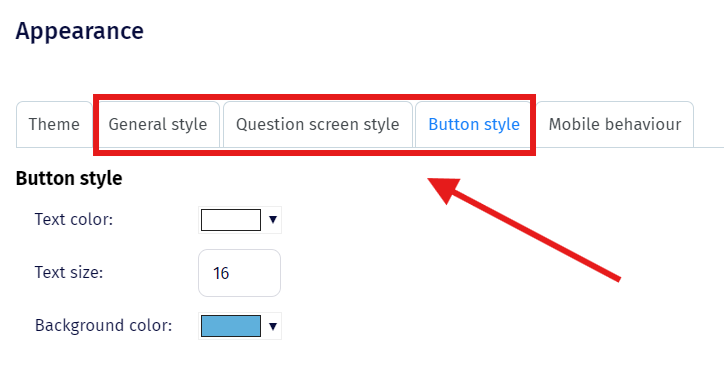
Then, you can use the style portions to customize your survey as per your preferences.
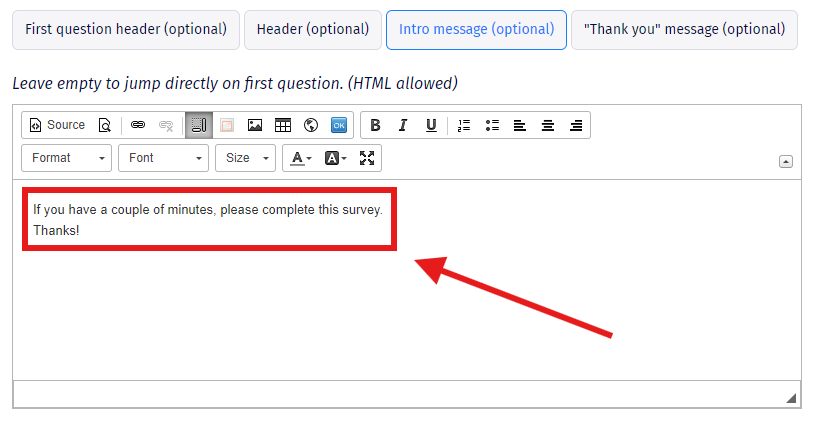
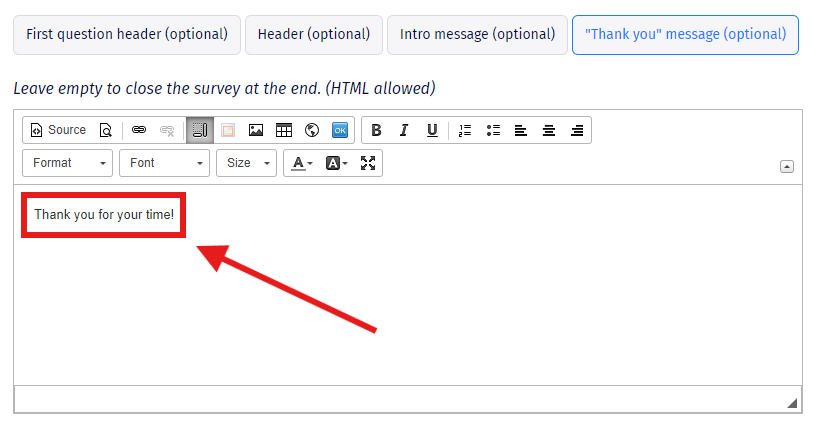
Step 10. Once the design is finished, go to Texts section and do the following changes:

Delete the default message for Intro message (optional):
Delete the default message for Thank you’ message (optional):
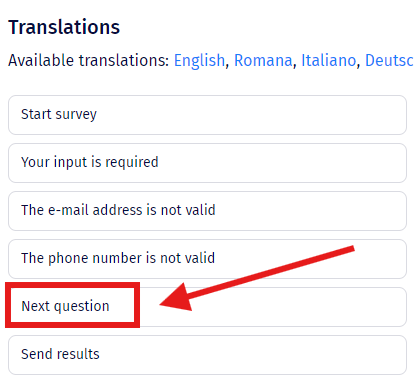
On the left side, replace the ‘Next question’ text (which is the Call to Action/Submit button text) with your own text. In our example we replaced the text with ‘Schedule a demo’.
Step 11. Go to the Audience tab and insert the URL of the pages where you want your experiment to run and the conditions for it. You can also add more fields by pressing the ‘+‘ button.
The same applies for Excluded URL pages, useful if you want the experiment to apply to multiple pages with few exceptions.

In the second part of the page, you must Segment the visitors by selecting a segment, choosing the number of visitors and the frequency of the survey.
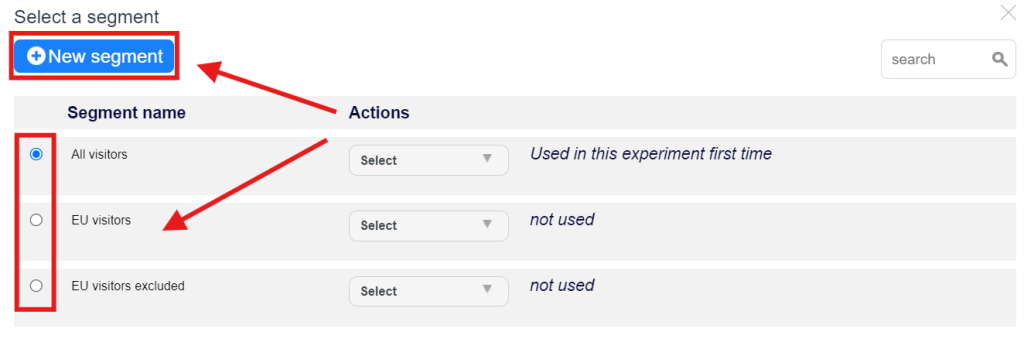
By default the experiment will be set to All visitors, just press on the Select or create segment to change it.
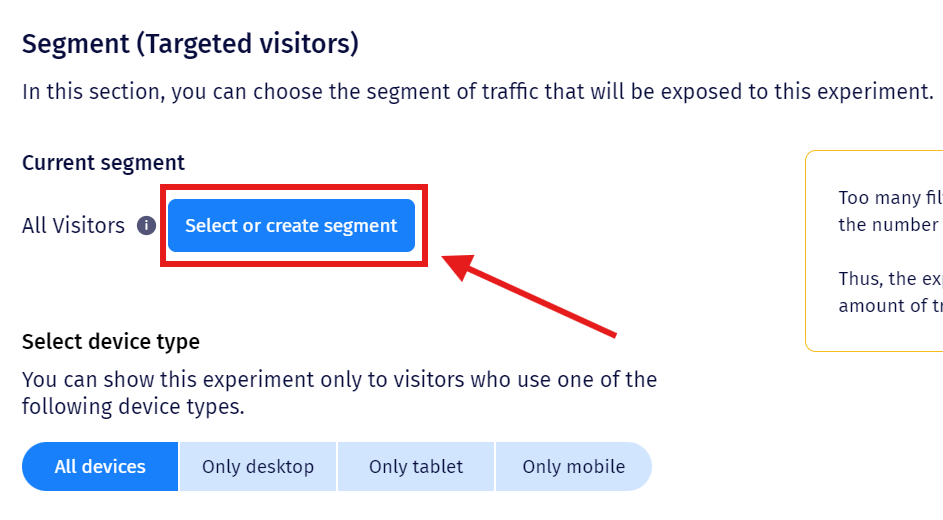
Here you are able to either select one of the existing segments or create a new custom.
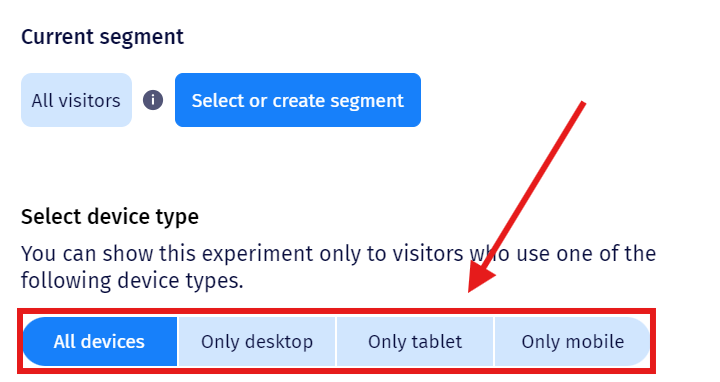
You can also customize the segmentation by the Device type, meaning only visitors using the specified device will be able to see the experiment.
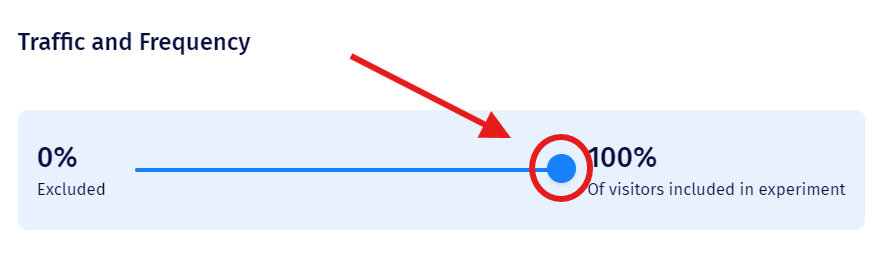
In the second part of the page, you will select the percentage of visitors that will see the experiment. This percentage will be randomly extracted from the segment you have decided to use. You can run the test on all of the visitors who are included in the segment or just a part of them (let’s say 50%).
Move the slider in order to determine the percentage of visitors from the total amount that will be included in the experiment.
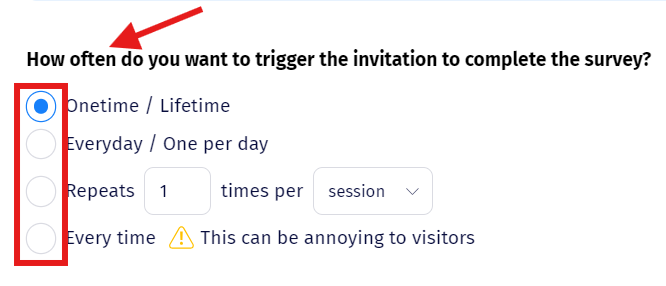
The next option for this is related to the frequency, which dictates how often the overlay can be shown to the visitors.
You can also add a Maximum number of responses (once that number is reached the survey will stop).
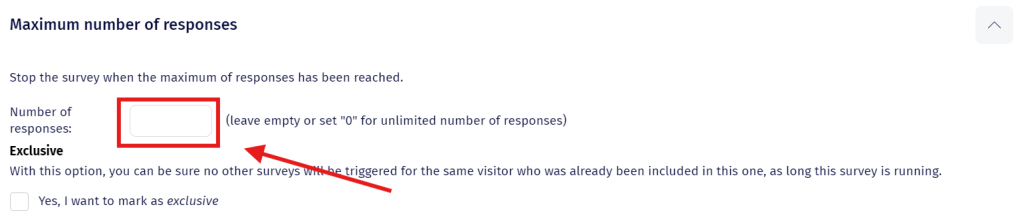
At the end you have the option to mark it as exclusive, meaning that no other experiments/surveys will be triggered for the visitors who already viewed this one, for the time it is running.

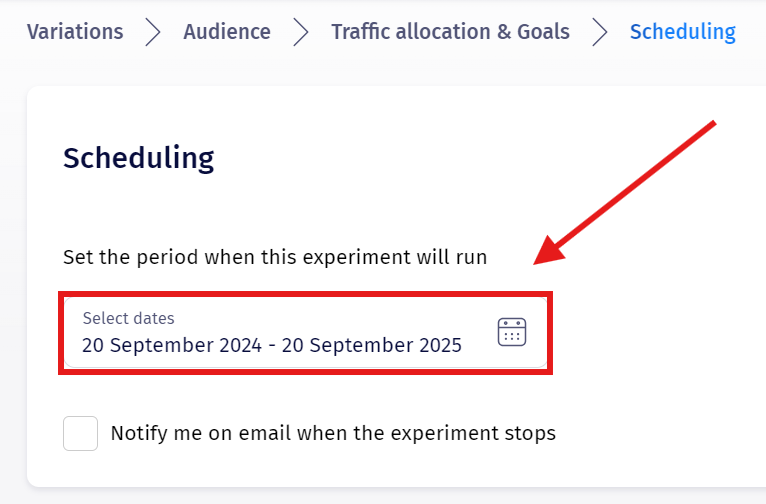
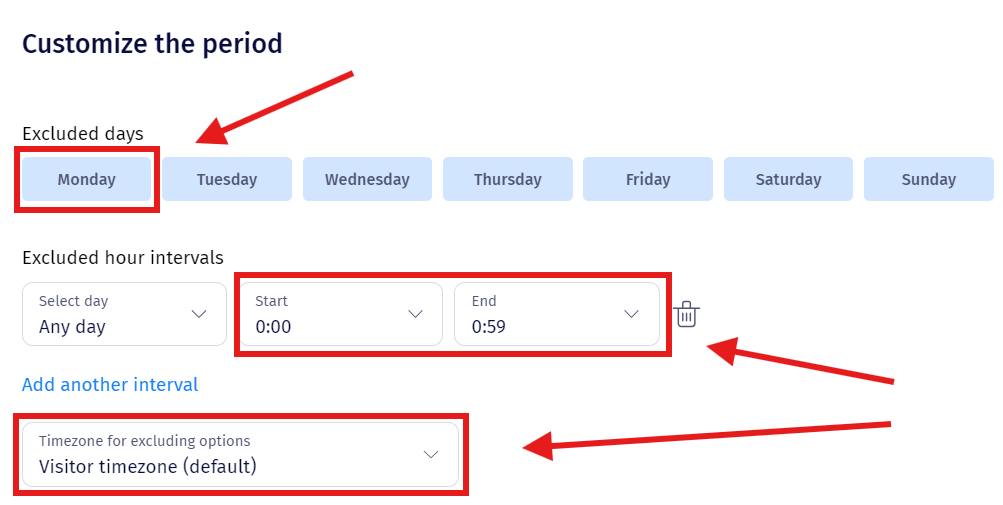
Step 12. Go to the “Scheduling” tab and set the period of availability. Also, set the days and hours when you want the experiment to be inactive.
You can then check this box if you want to be notified of when the experiments ends, using either one or multiple email addresses.

You can also set up excluded timeframes, either by selecting specific days or specific hours throughout the day. By default the Excluded hours intervals are not displayed but it will appear once you press the Add another interval button. The timezone options represents the timezone which should apply to the hour intervals you have selected previously.
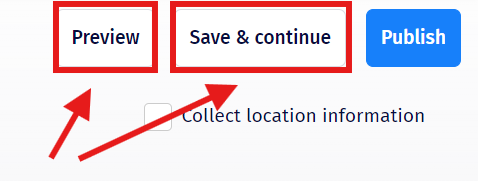
Step 13. Click on Save & Continue, this will not make the survey public but will unlock the Preview button next to it, so you can preview your survey in a new tab).
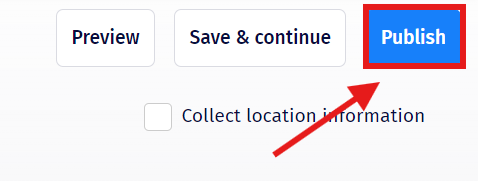
Step 14. If everything looks good, hit Publish and your experiment will start.
DON’T FORGET: After each time you publish or update an experiment, you have to wait 3-4 minutes until it will be visible on your website. If you want to see the changes live instantly, install the OmniTool extension that helps bypass the cache system which generates the delay. You can download OmniTool here.