Once you create a new overlay, choose the preferred template, the trigger, and you will get to the design settings step.
In the variation editor, you can apply modifications to the overlay, such as changing the text font, color or size and personalizing the message using custom variables, custom attributes or OnPage Variables. These options are unlocked once you press on an element from the overlay.

On the left side is Design, where you can determine the opacity of the overlay, if it will use either a color or an image (for which you need to insert the URL of the image).

You can also set the Submit and Exit buttons to redirect to a specified URL, close the overlay or trigger an experiment.

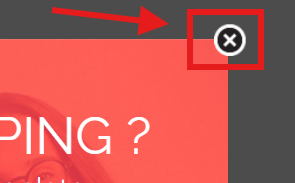
Please bear in mind that the Exit button does not refer to the ‘X‘ button in the upper right corner of the overlay, but the button which allows you to ‘deny’ the overlay offer, which is only present on some of the templates.

In the Settings area you can set a name for your template, decide if you want to show the ‘X‘ button (located on the upper right corner of the overlay).
You can also set the amount of time you want to pass before the overlay shows up after being triggered and how long it will stay on screen before it will auto-close. Leaving this values as 0 means the overlay will start when it is triggered and it will never auto-close.
You can also choose an animation for the overlay, and you can customize it’s direction.

Some overlay templates include a Lead Collector that you can also adjust according to your needs. You can collect information such as name, e-mail or phone, and mark it as mandatory or not. You can also set up the leads to be sent to Email, Webhook, Campaign Monitor, GetResponse, Freshmail, Mailchimp and Zapier. Collect location information can also be enabled from here.

You can also set a personalized Thank you message for this lead collector, as well as choose a specific action for when the button is being pressed.

What is more, if you want to apply certain modifications to the overlay that are not available in the design editor, you can use the code editor to enter your own custom code. You will find it at the bottom of the page, by clicking on the </> Code Editor button.

Also, you can switch between different Device types to preview the overlay.

Once you are done with designing, use the Live preview button above the variation editor to open a full screen preview of your overlay in a new tab.

To complete creating your overlay and publish it, continue to follow the steps in this article.