In order to activate an overlay that triggers at click, you have to create two experiments: an A/B test and an overlay experiment.
Creating and setting the overlay
First, you need to create the overlay. Here are the general steps you need to follow, taking into consideration the indications below.
It is very important to set the trigger for the overlay to be On load:

Also, in the Audience tab (Manage pages where you want to run this experiment), leave the included URL pages fields empty:

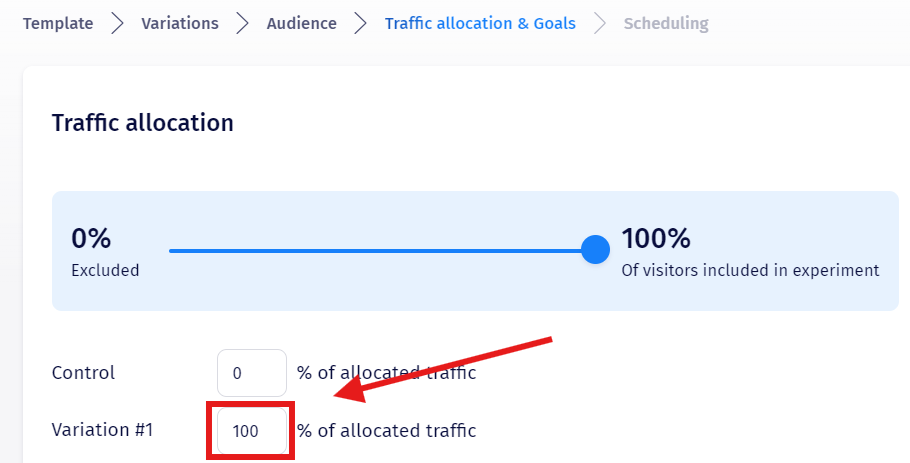
On the Traffic Allocation & Goals tab, set the experiment to run 100% on Variation:
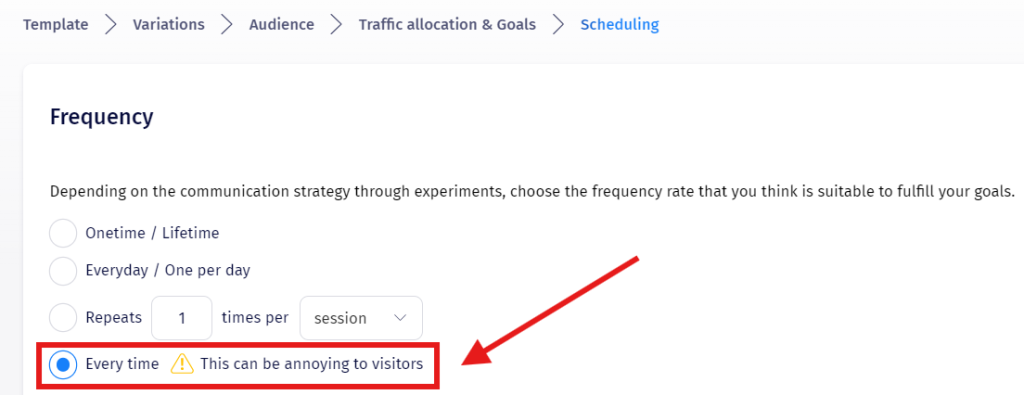
In Scheduling, set the Frequency to Every time:
Connecting the overlay to the A/B test
For the second experiment, go to the A/B Testing section to create a new experiment. If you require assistance during the creation, you can learn how to create an A/B Test in Omniconvert by checking out this article.
While in the Visual Editor, select the button which will trigger your overlay by clicking on it, choosing Trigger Experiment and then Trigger Interaction.

Now select the variation you want the experiment to be showing in.

After that, all you have to do is to continue following the steps in creating the A/B test, as mentioned in this article.