The On Click goal functionality is the same as the Track Clicks goal, but this one is Global. This means that you can use the same goal for multiple experiments.
This is a rather simple goal to integrate as it only requires the element which you want to track to be added. To create this goal you need to:
Steps
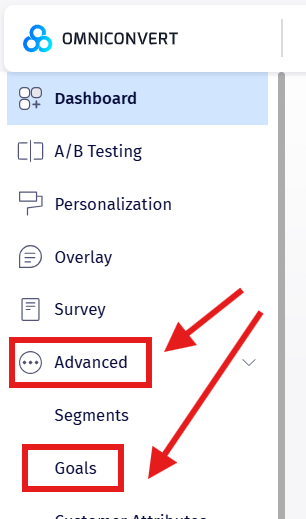
1. From the left menu click on Advanced and then Goals.
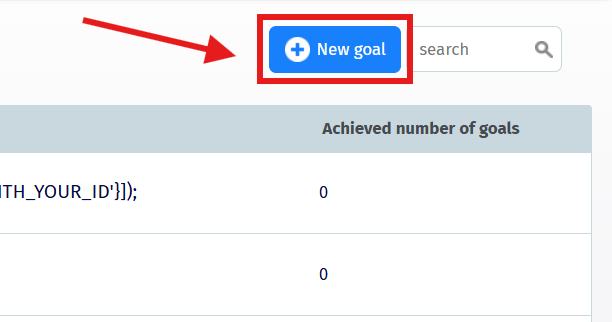
2. Press on the New Goal button on the right side of your screen.
3. Now you will be able to choose a name, description and whether the experiment will allow multiple conversions per visitor session.
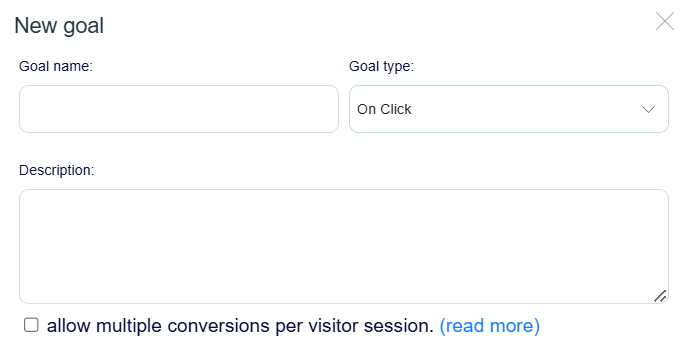
With this option enabled, the goal will be tracked multiple times during the same visit session and for the same visitor.
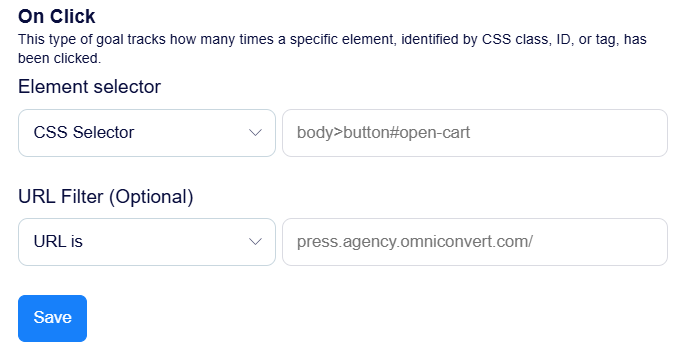
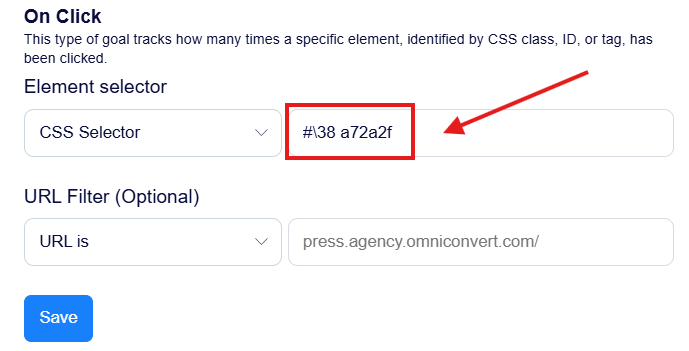
4. Now select the On Click from Goal type and you will have to insert the element you want to track.
Here you have multiple options when it comes to inserting your element.

If you do not have the developing skills, worry not, here is how to find each element id by its type:
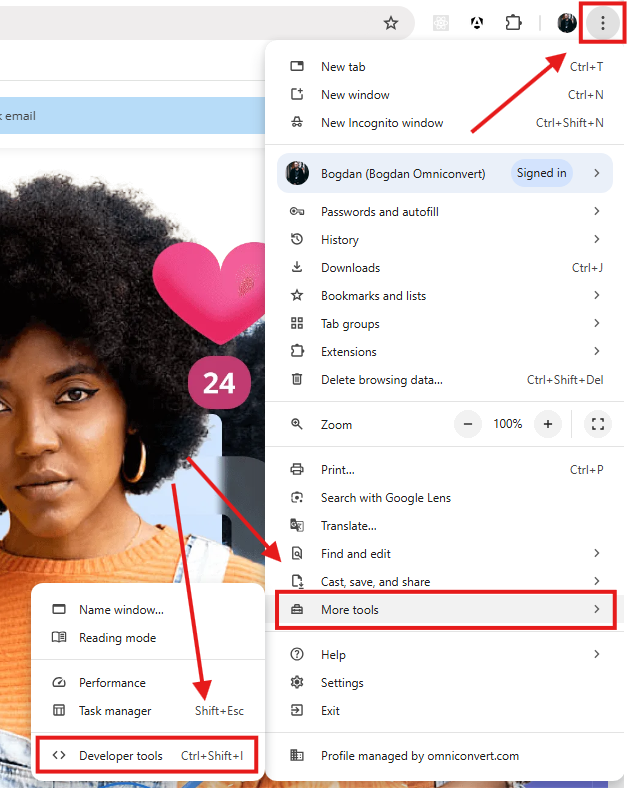
- While on your website, open the Developer Tools either by pressing Ctrl+Shift+I or by pressing the 3 dots next to your Account, then go to More Tools, and finally Developer Tools.
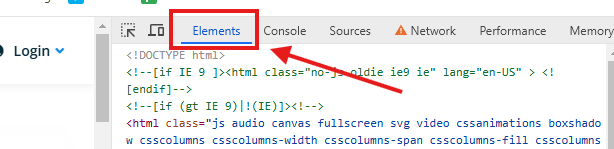
- Once the console opens, go to the Elements tab.
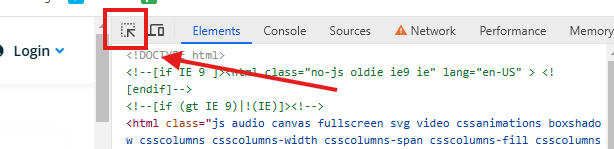
- Now press on the Elements Inspector button. This will allow you to hover your mouse cursor over any element on the website and inspect it.
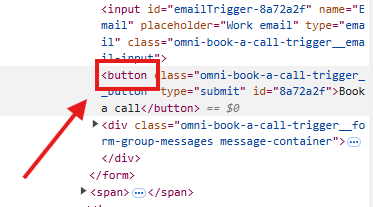
- If you click on the element, it will get highlighted in the Elements tab on the console.

- Depending on which type on which type of element selector you decide to use, here is how to obtain it:
HTML Tag Selector
- Go to the highlighted element in your console and copy the value situated in front of class. In this case it will be ‘button’
- This is useful if you want to track all the elements on a website which have the same tag.
HTML Element ID Selector
- Go to the highlighted element in your console and copy the value situated after id. In this case it will be ‘8a72a2f’.
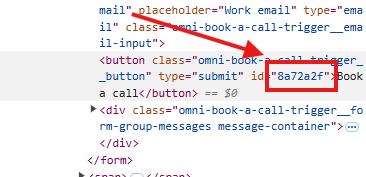
- This is useful if you want to track all the elements on a website which have this exact id, but please bear in mind that not all elements will have an id.
HTML Class Selector
- Go to the highlighted element in your console and copy the value situated after class. In this case it will be ‘omni-book-a-call-trigger__button’

- This is useful if you want to track all the elements on a website which have the same class, but please bear in mind that you can only use one class for a goal, and elements can have multiple classes.
- If your element has multiple classes we advise using the CSS Selector option.
If your Class Selector has spaces between the words, please replace them with dots, as such:
main button -> main.button
CSS Selector
- Go to the highlighted element in your console, right-click on it and select Copy, then Copy selector.
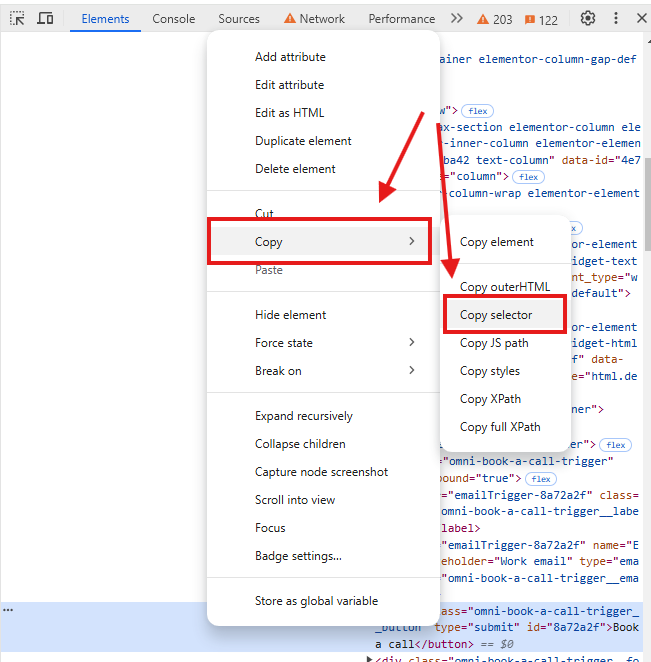
- This is useful if you want to track a specific element and is also the best option to use when setting up an On Click goal.
5. Once you copy the selector via one of the previous methods, go to the goal screen and paste it.
6. Once you are done, press Save.
This goal also works for multiple selectors at once, just add and separate them with a comma and space. Example: Selector 1, Selector 2
Using a Goal
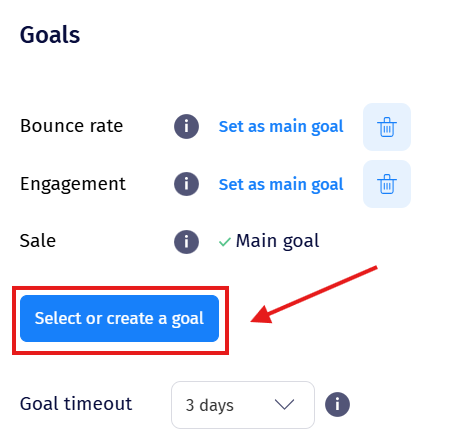
After you created your goal, do not forget that you need to manually add it as a goal for your experiments. This can be done from the editing view of the experiment, by going to the Traffic allocation & Goals section and pressing on the Select or create a goal:
And click on the check box next to the goal.
