The visual editor is the way you can modify the content of a page without learning code or hire expensive programmers.
Important: Make sure you have the Omniconvert Explore A/B Editor Extension for your browser as this will allow you to access the Visual Editor, you can install it from here.
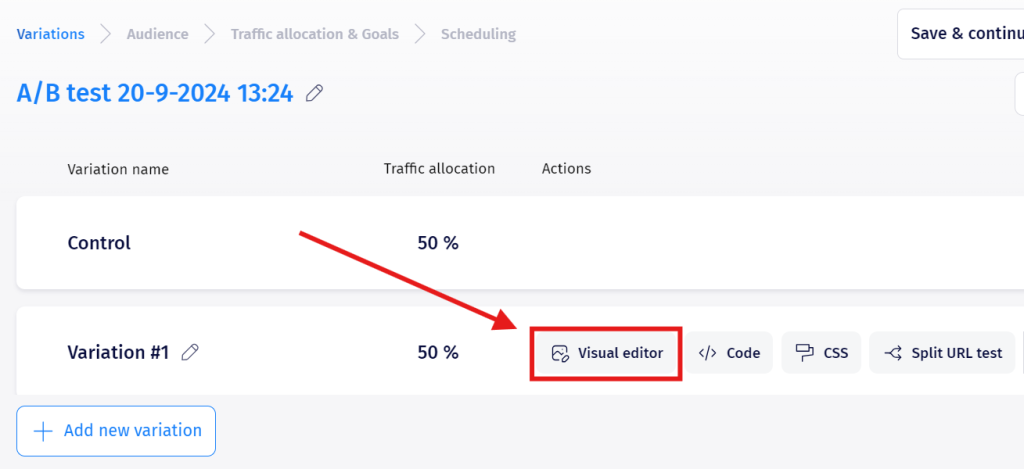
You can access the Visual Editor after you add your first Variation to your experiment.
If you need a guiding hand for creating your first experiment, we have a comprehensive guide for it here.
After creating your experiment and adding a Variation, press on the Visual Editor to begin the editing process.
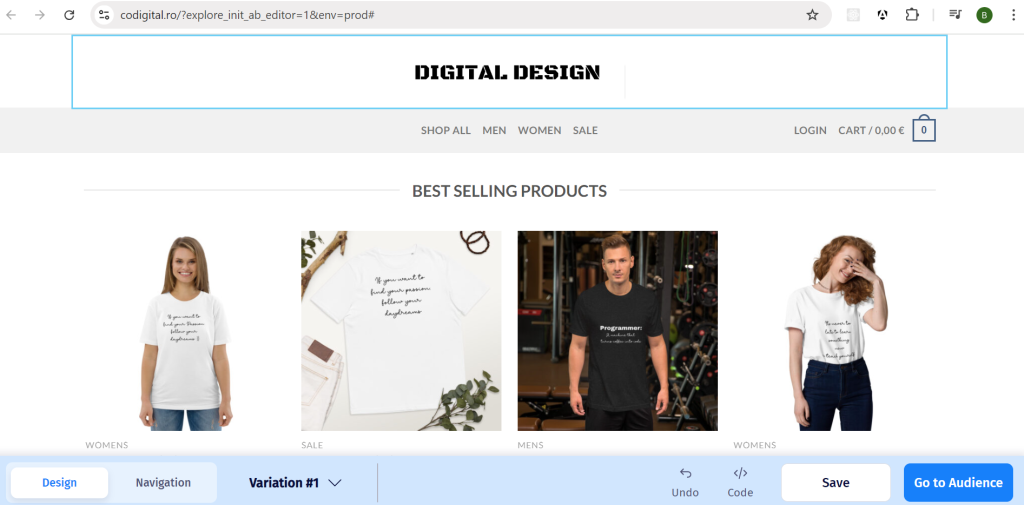
Once you enter the Visual Editor a new page will open containing the URL you have previously entered, here every time you hover your mouse over a page element (image, link, piece of text, etc.) inside the variation, you will be able to edit it.
Design Mode
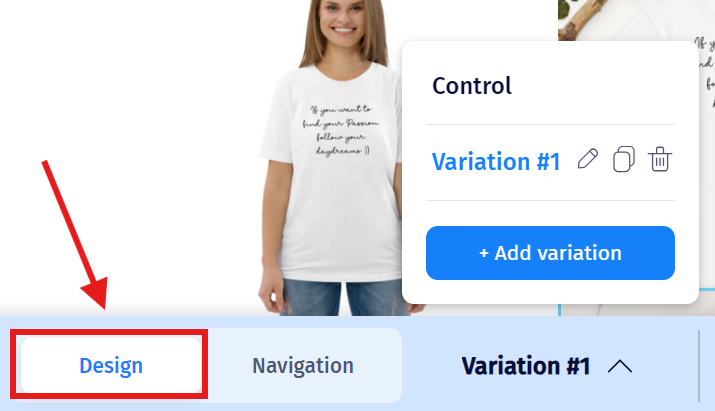
On the bottom left you can see three buttons. Design takes you to this current tab, allowing you to edit elements.
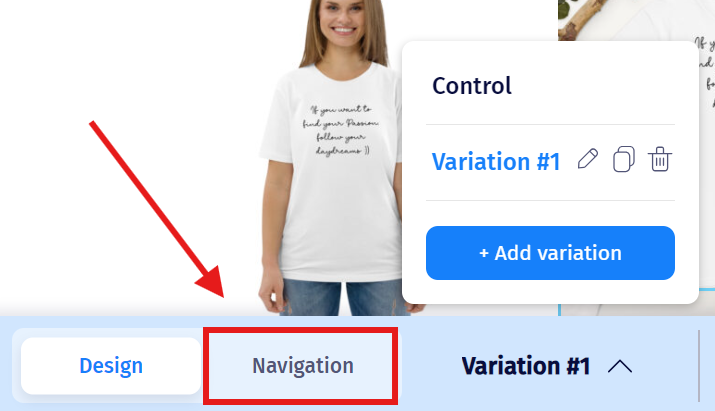
Navigation Mode
Navigation allows you to interact with the website itself, this is useful if you need to edit some elements after the page fold, or elements on other pages. Using this option you can navigate the website as if you were outside of the editor.
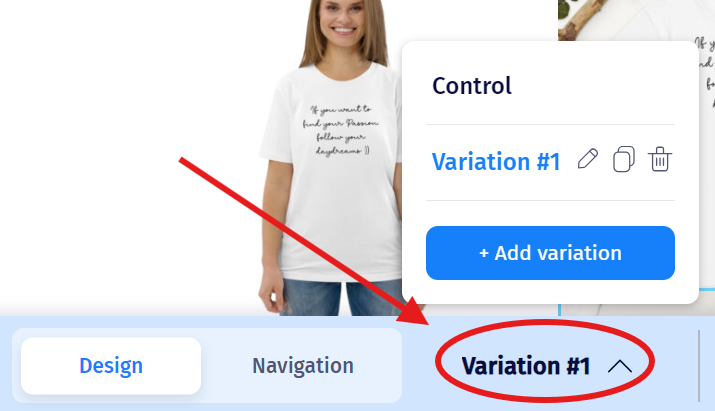
Variation Switching
Hovering over the Variation Name will allow you to switch between Control and Variations, allowing you to add, delete or clone variations as per your needs.
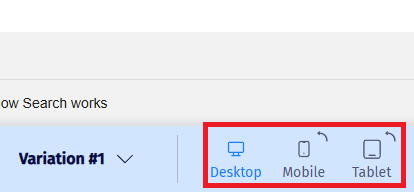
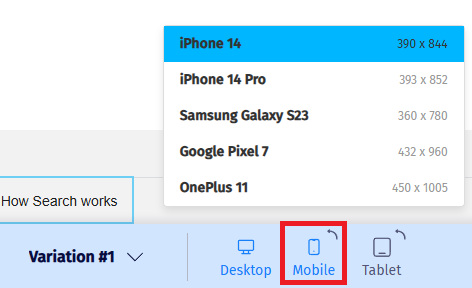
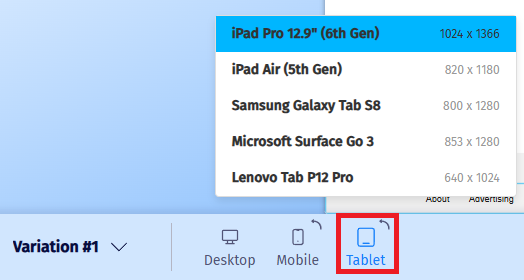
Device Switching
Next to the Variation Picker, you will see 3 device options. This allow you to see make changes as per different devices such as Desktop, Mobile or Tablet. Once you choose one of these options, each including multiple device models, your view will change to that of the respective device.
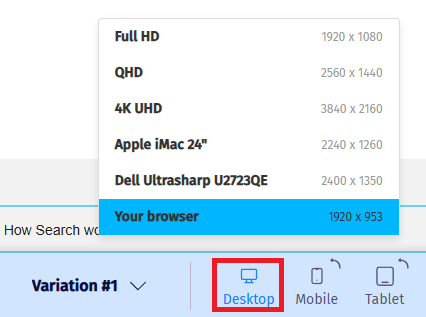
Desktop
This is the default view, which will show you the view of a regular desktop. It includes multiple screening types.
Mobile
This will change your view to that of a mobile device, therefore allowing customization of experiments for smaller screens.
It also comes with different device models, each with different screen sizes.
Tablet
This will change your view to that of a tablet device, therefore allowing customization of experiments for medium sized screens.
Once again, it comes with different device models, each with different screen sizes.
Undo Button
The Undo button on the bottom right of the Visual Editor allows you to undo the last change that was made during editing.

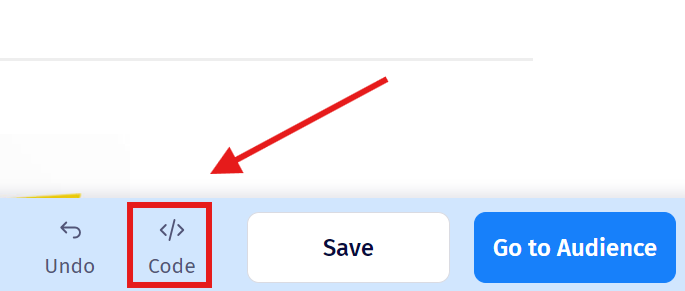
Code Button
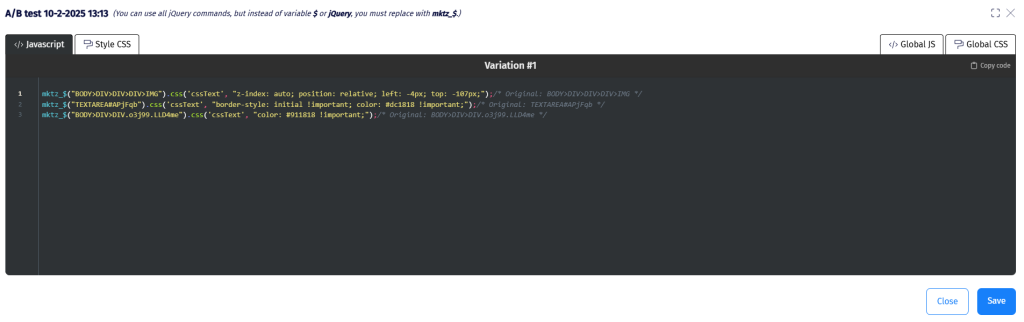
The </> Code button is where you will see all the changes you’ve made translated into code.
It also allows for even more customization of your experiments, by using custom code instead of just the Visual Editor.
Operations
While in Design mode, depending on the element type, it will contain the following operations.
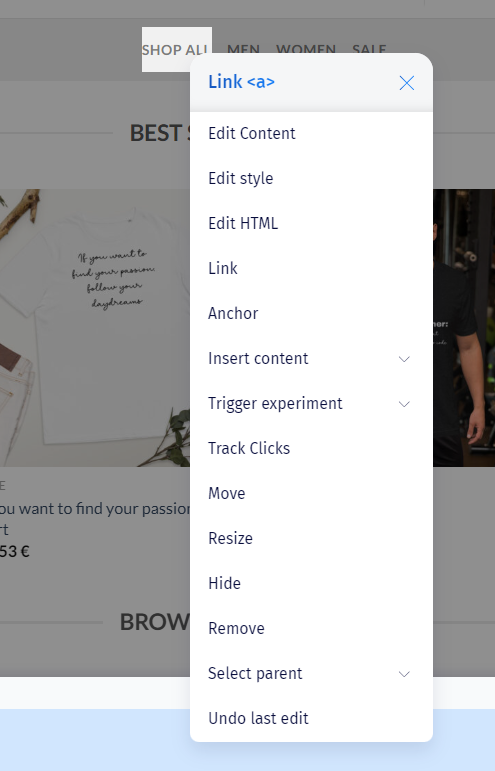
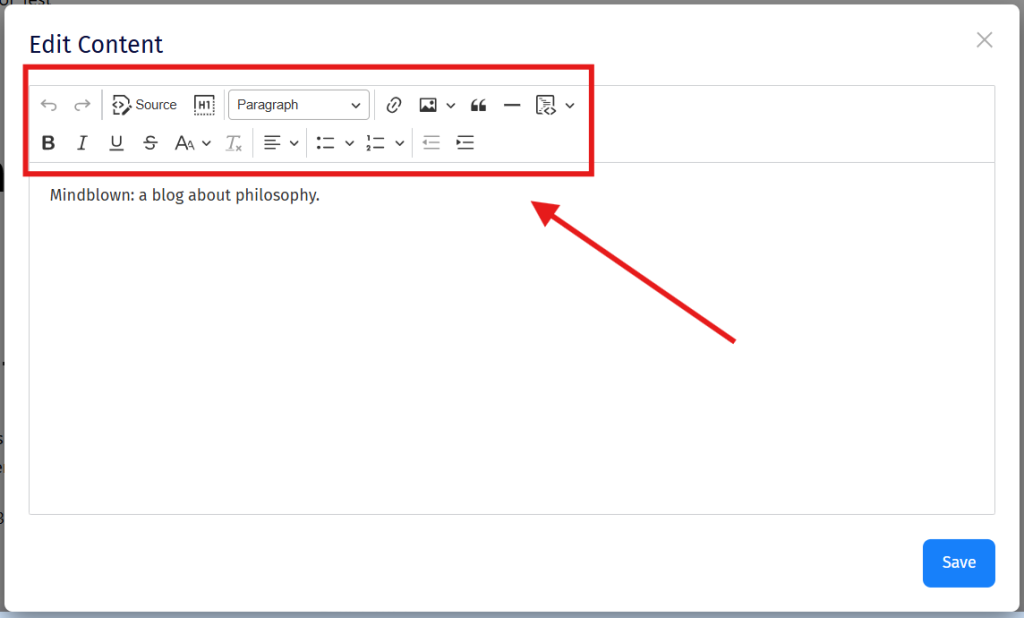
1. Edit Content
Allows you to make changes to the content of an element such as replacing the text inside a paragraph.
2. Edit Style
You can change the style of the element, details related to text, color, background, dimensions, borders, layout or even add custom CSS attributes.
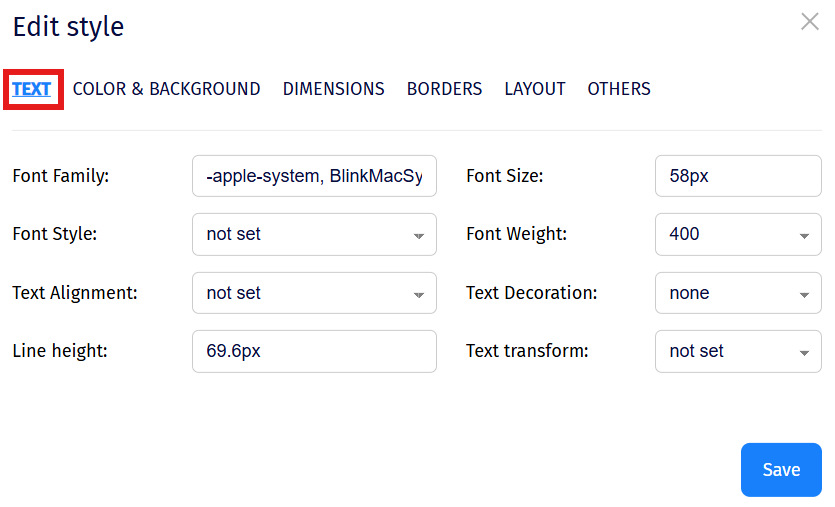
Text: allows you to edit text settings such as font family, font size, line height, alignment, etc.
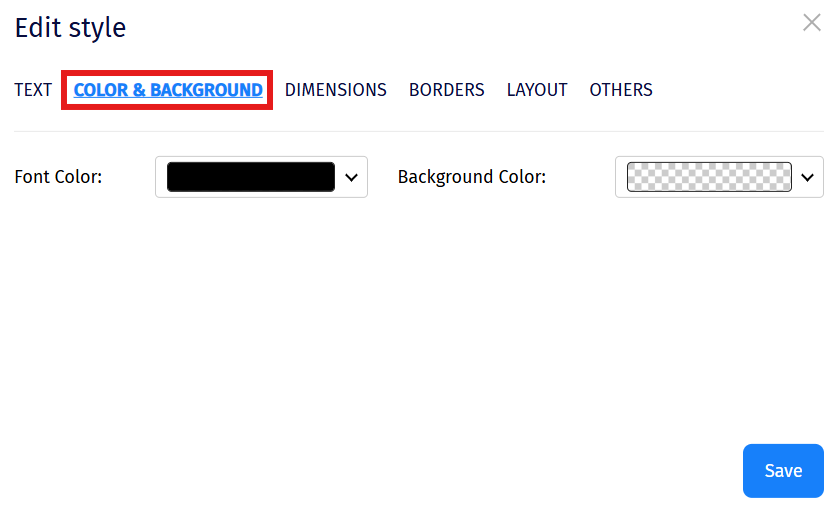
Color & Background: allows you to edit the text color and the background color of the selected element.
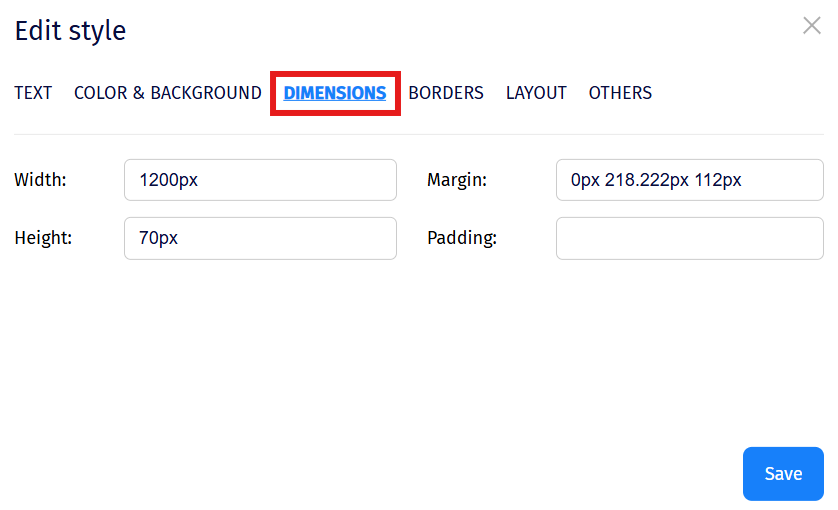
Dimensions: allows you to edit the dimensions for selected element, such as width, height, padding and margin.
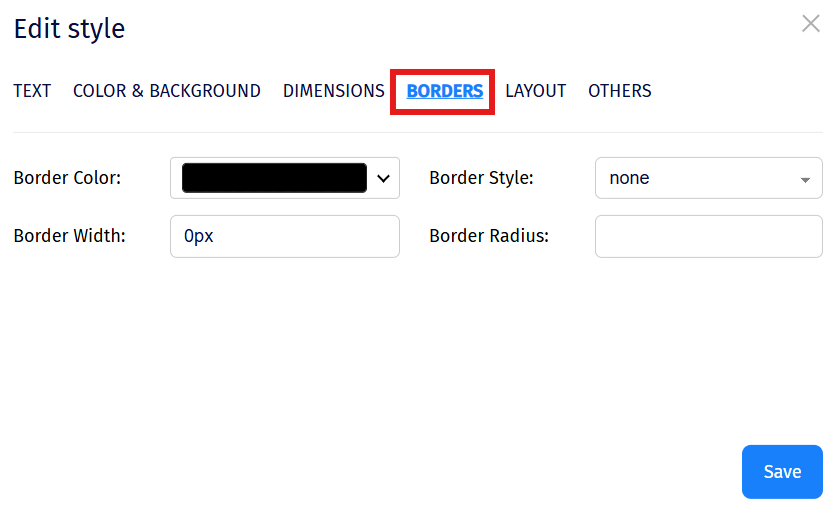
Borders: allows you to edit the border options, such as the style, width, color or radius.
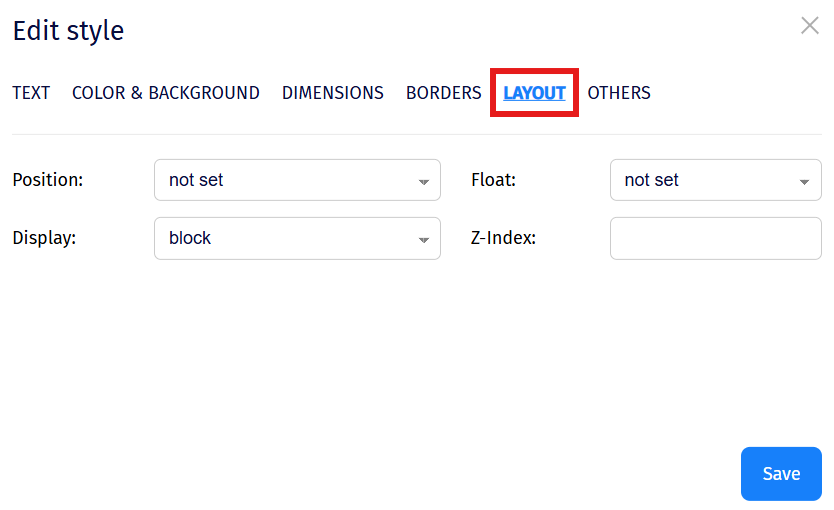
Layout: allows you to edit the CSS attribute and values regarding the layout of the selected element.
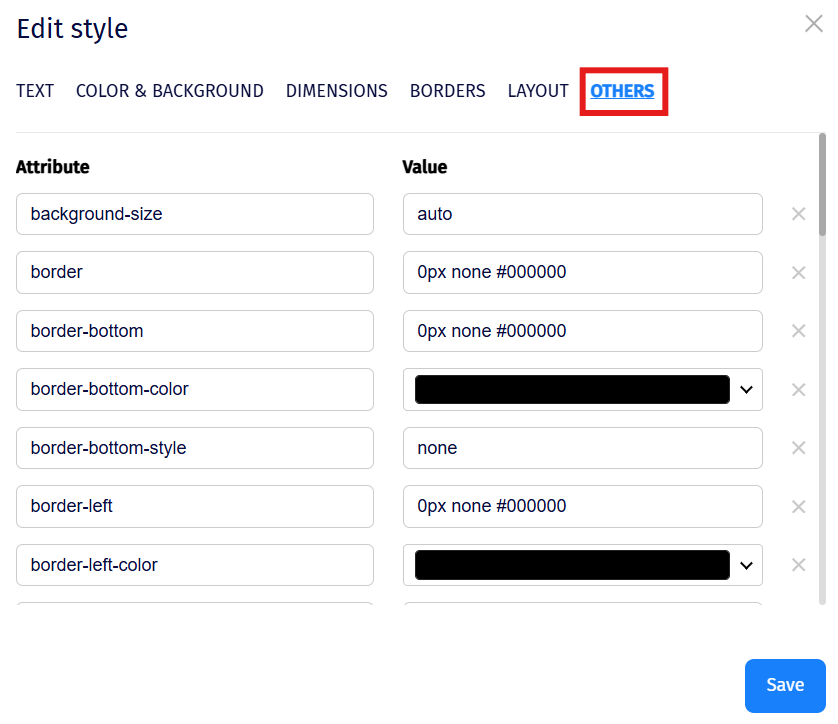
Others: allows you to edit add/edit/remove different CSS attributes and values for the element, such as border-bottom, background size, etc.
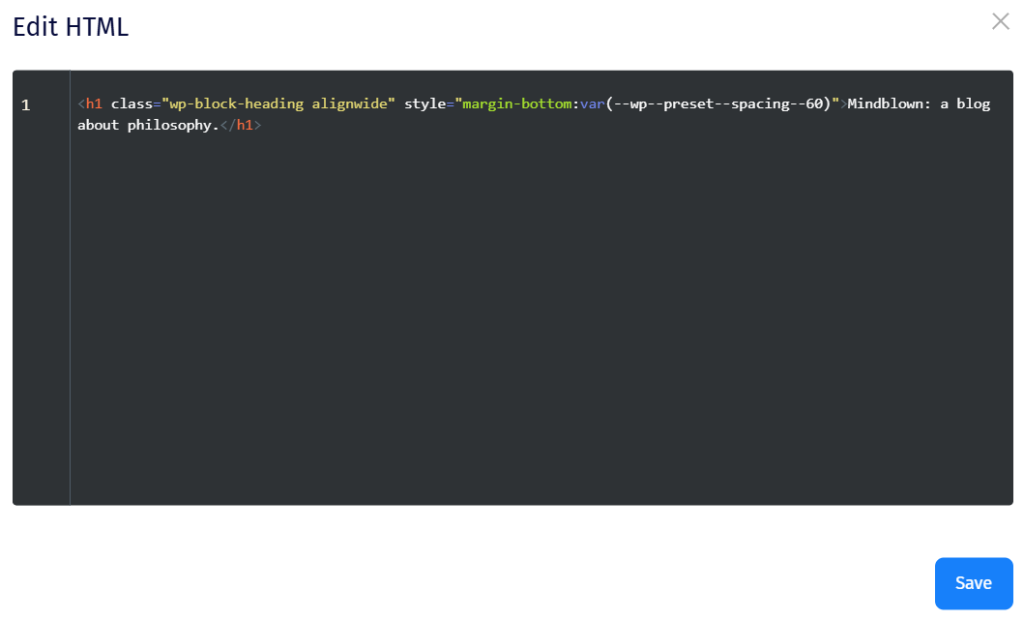
3. Edit HTML
Selecting this allows you to make changes inside the HTML code of the element.
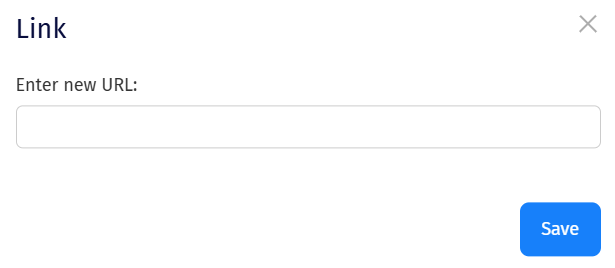
4. Link
An option available only for links, which lets you add a new URL for the element.
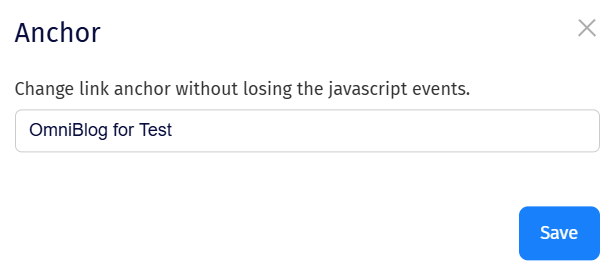
5. Anchor
Allows you to change the link anchor without losing the javascript events; this option is also available just for link-type elements.
6. Change Image
This option is available only for images, which lets you change or upload another image.

7. Insert Content
Before selected: you can add content before the selected element.
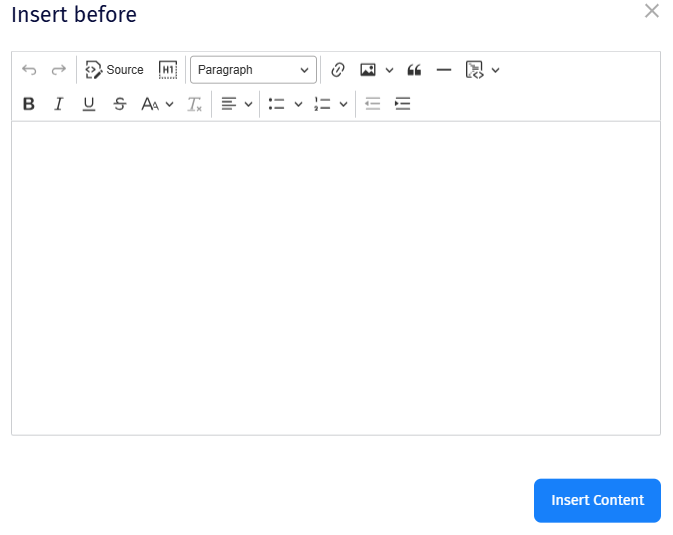
This option allows you to insert a new element (text, image, etc.) before the selected element. It also allows you to format the new element using the options above.
After selected: adds content after the selected element.

This option allows you to insert a new element (text, image, etc.) after the selected element. It also allows you to format the new element using the options above.
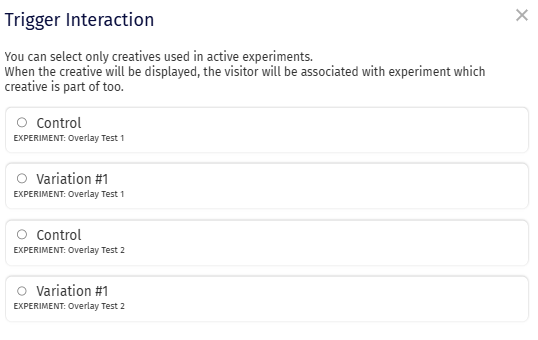
8. Trigger Experiment
Trigger Interactions: you can set this element to trigger an overlay from your active experiments upon being clicked. You can select which variation of the overlay you want to be triggered.
Trigger Survey: you set this element to trigger a survey from your active experiments upon being clicked.
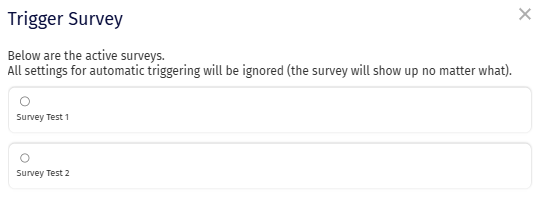
If you attach a Survey to a trigger, all settings for automatic triggering will be ignored (the survey will show up no matter what).
9. Track Clicks
Sets an on-click trigger goal that tracks how many clicks were made on that certain element.
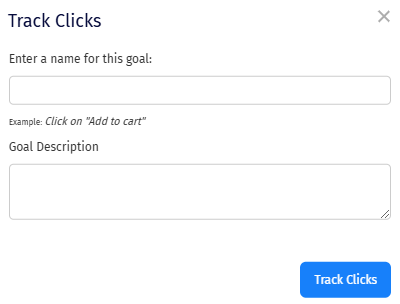
This trigger goal is created individually from inside each A/B test. It is a Local Goal, which means it will not be available in the Goals section from the left side menu.
You can read more about this goal by following this article.
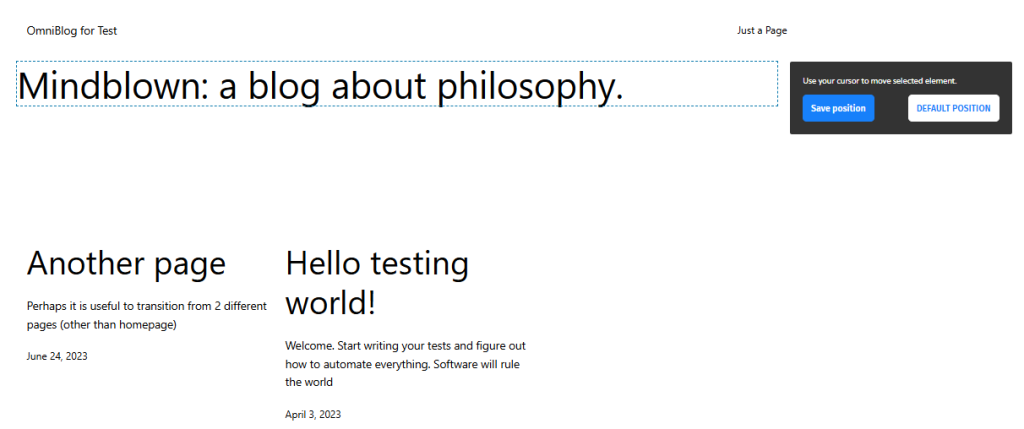
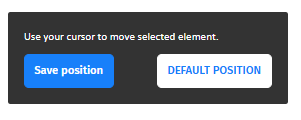
10. Move
Lets you set another position for the selected element from a CSS perspective (the position attribute). Drag and drop the selected element from its old position to its new one.
Before:
After:

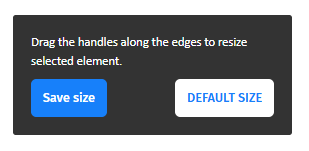
Press the Save position to confirm the movement, or press Default position to reset it to its original placement.
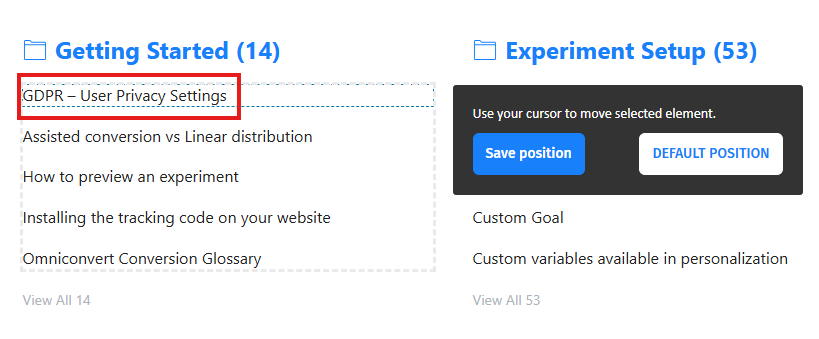
11. Rearrange
You can rearrange the element from an HTML perspective (it changes the hierarchy of the HTML elements that are included in the list). Press and hold the element and move it anywhere within the list.
Before:
After:
Press the Save position to confirm the movement, or press Default position to reset it to its original placement.

12. Resize
You can resize the element directly from the editor. You can do this by holding the edges of the element and dragging them.
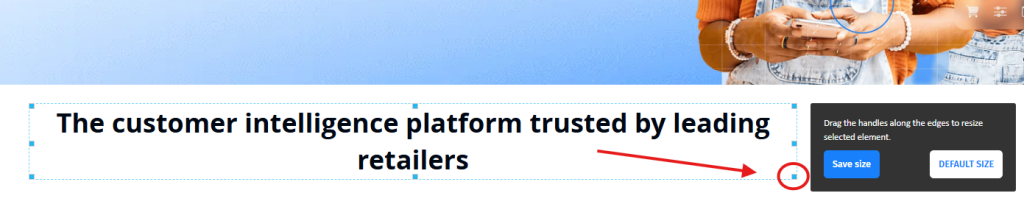
Press the Save size to confirm the movement, or press Default size to reset it to its original placement.
13. Hide
Hides the element from the page using the CSS style attribute ‘visibility: hidden’. This means that the element will still exist but will not be seen on the website.
Before:

After:

14. Remove
Removes the element from the page and all its attributes and values. This means that the element will be completely erased.
Before:
After:
The different between Hide and Remove is that Hide will keep the element itself, but it will not be visible. Remove will delete the element.
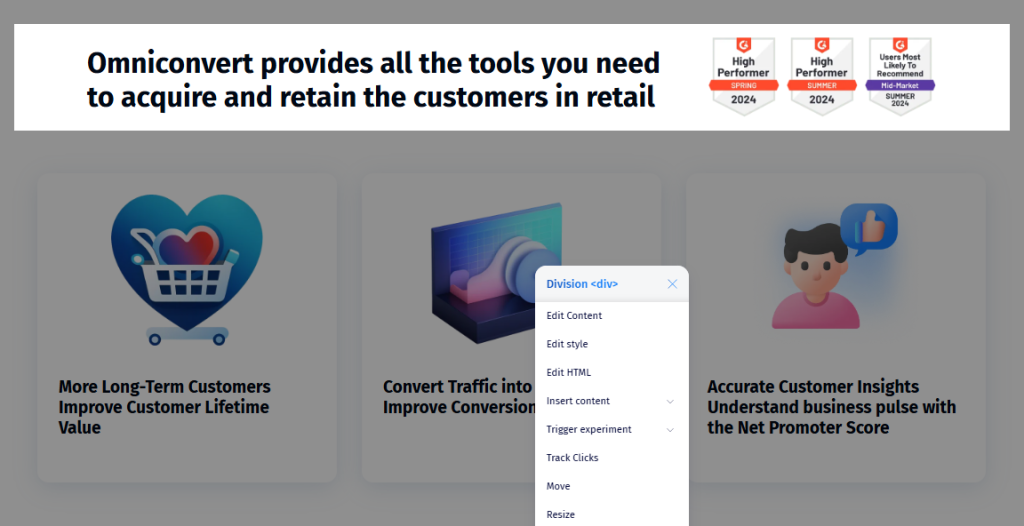
15. Select Parent
Selects the parent tag of the element. You can select multiple elements belonging to the same ‘family’.
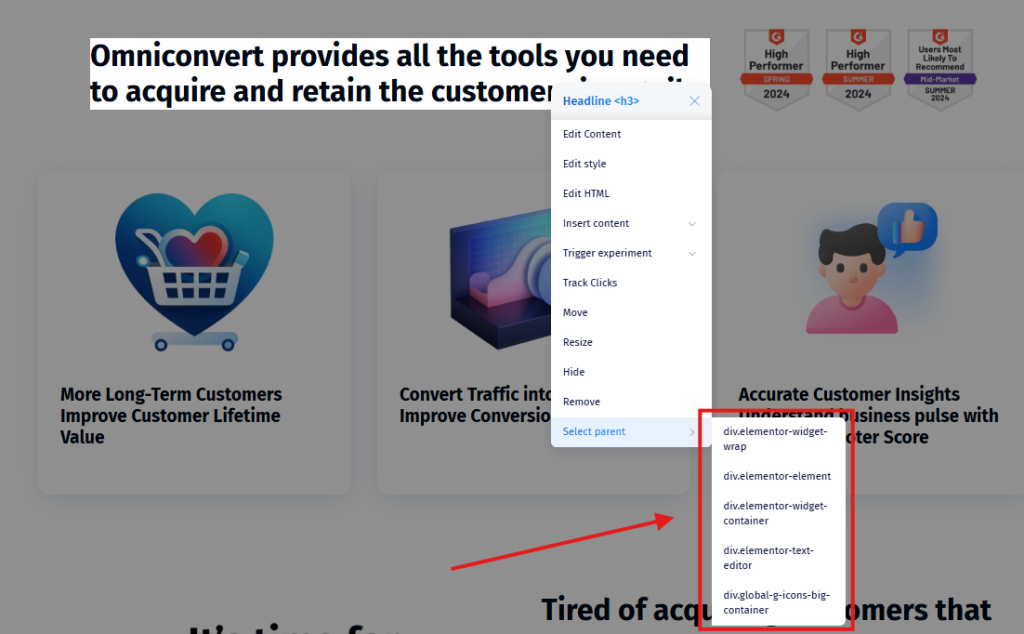
Once one is selected, you can automatically edit it.
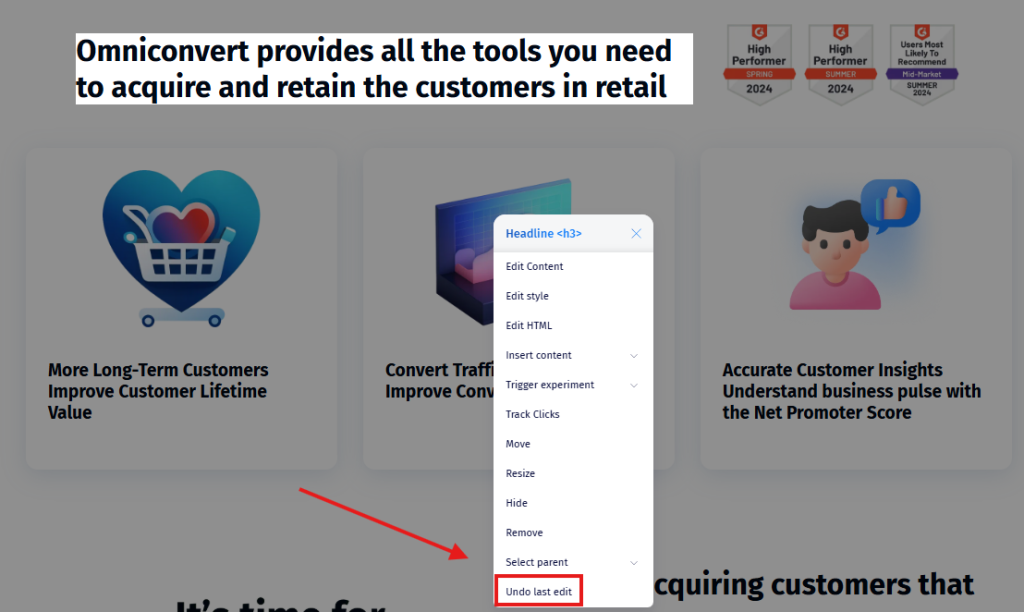
16. Undo last edit
Cancels the last change that was made.