You can set up surveys with Omniconvert and ask visitors for feedback on various aspects of your website.
Step 1. Create a new Survey
From the main left menu choose the Survey option.

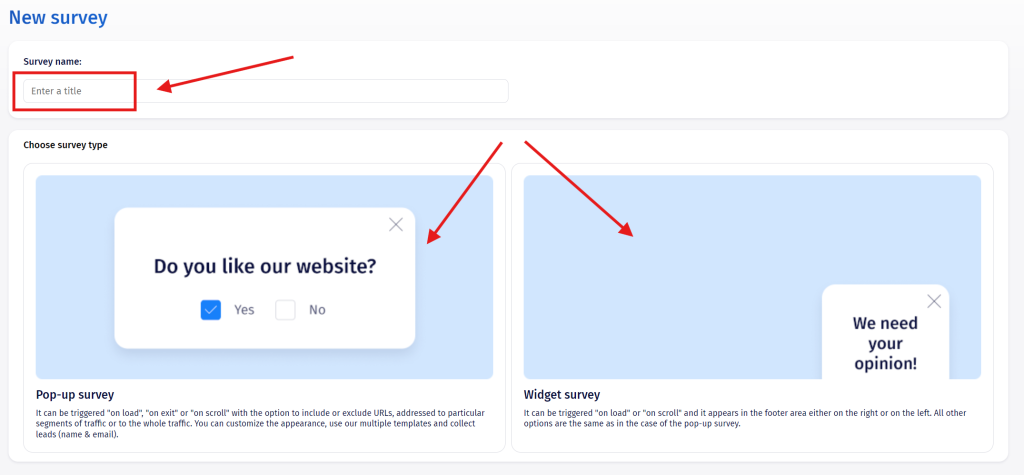
Click on New survey from the right:

Name it and choose between 2 types of surveys Pop-up or Widget:
Step 2. Add your Questions
You can add as many questions as you like. Just write the first question into the Question title field, select the type of answer from the Answer type drop-down field and click save. You can select the question to be “required” or not.

The answers can be of the following type:
1. Small text answer: This is a single line text box without limit for characters
2. Large text answer: This is a multiple line text box without limit for characters
3. Multiple choices (check boxes): This option lets the visitor choose multiple answers
4. Unique choice (radio): This option lets the visitor choose only one answer
5. Images: With this option you can show the visitor pictures as answers
6. Dropdown: This will show the predefined answers in a drop down mode
7. Scale: With this you can make your visitors answer questions like “How much did you like it
on a scale from 1 to 10″
8. Grid: This option will show the answers using a grid layout.
9. Net promoter score: This option is a standard question type which is the base of one of the most important marketing KPIs, related to customer satisfaction. Read more here

After you select the answer type for your question you can apply the advanced branching logic.

This feature can be applied to all the answer types. Using this system, you can direct the respondent to :
– a specific question
– to a personalized experiment
– redirect him to a specific URL
– take him to the end screen or
– close the survey.
All of them are based on the previous answer.

Step 3. Set up your Lead Collector
The next step is optional and it’s about the Lead Collector. This very useful feature can be used to collect your visitor’s details, email, name, phone number, etc. Choose whether to insert or not a lead collector at the end of the survey, after all the questions are answered. (enable/disable option):

First, you can set up a message you want to be displayed before the lead form from the Lead Collector Header, but this is optional.

Then you can insert the type of information to collect. Checking the box next to the Fields will made the information mandatory.

When it comes to where the leads are being collected, you can do this via email, webhook or a mailing list provider.

As far as the mailing list providers, these are the options currently available: Mailchimp, CampaignMonitor, GetResponse, Freshmail, Zapier.

Step 4. Customize your survey design
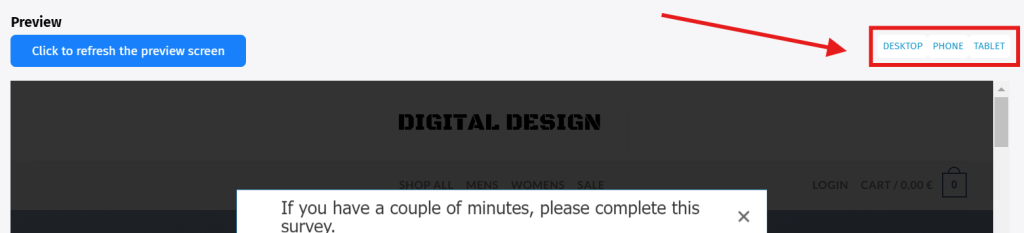
In Appearance section you can find multiple options for personalizing your survey. Every time you make a change, you can see how it will look like in the survey preview at the bottom of the page. This preview also allows you to change the view per device type.
The first portion is for the Theme. Here you can select one of the multiple pre-made themes available.

You can also Select the triggering method for your survey, as long as set up a time delay for the trigger, in case you do not want the survey to immediately pop up.
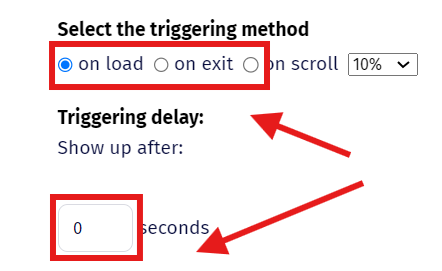
We recommend using the delay only with the on load triggering method.
The next portions are for further customization of different components of the survey design, useful if you would prefer to make a Theme yourself, rather then use a pre-made one.
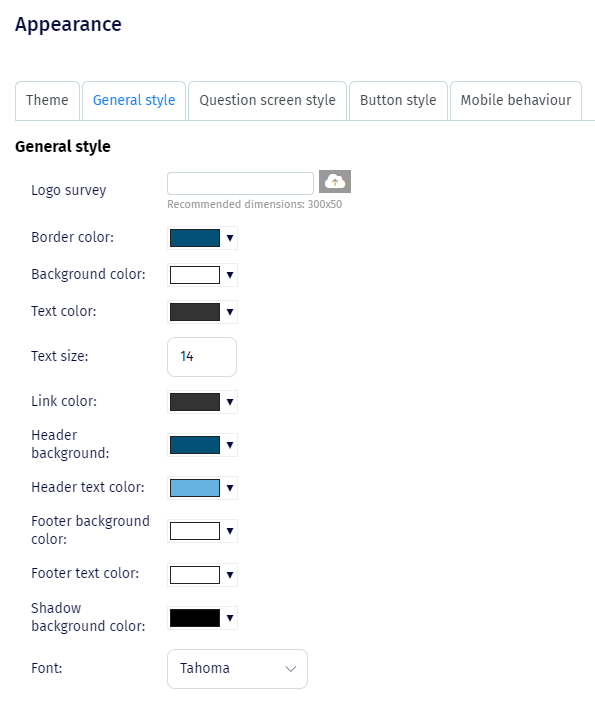
General Style is for the body of the survey, you can also add a Logo of your choice.
Question screen style is for the questions customization:

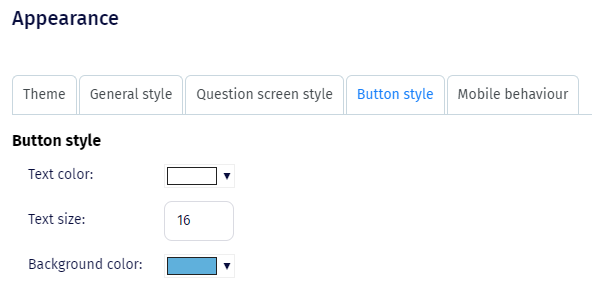
Button style is for the buttons customization:
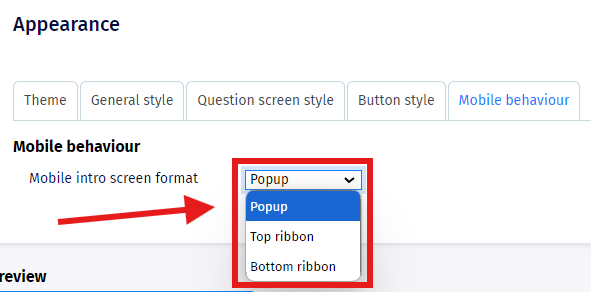
And the last portion is Mobile behavior, which has a drop down where you can select the survey position on the page when viewed on a mobile device.
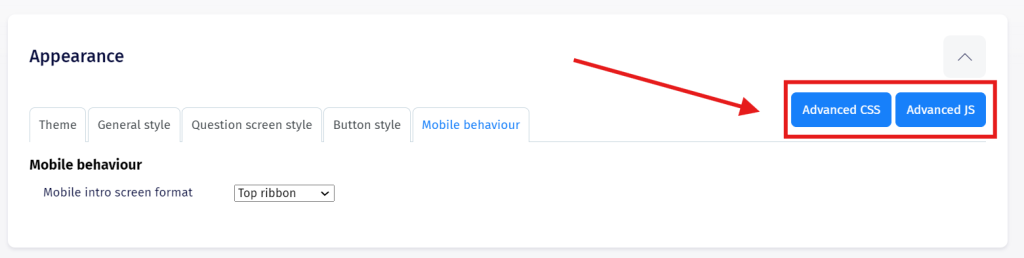
If you wish for further customization, you can also write your own code for the survey design using Advance SS and Advance JS. We have an article related to this which you can find here.
Step 5. Customize your survey texts
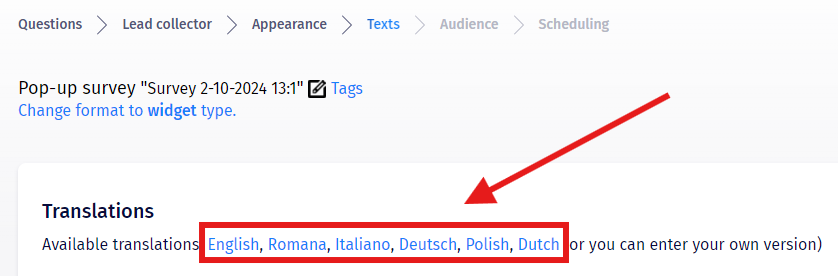
It’s time to select the Texts which will be inserted in your survey. You can select from the predefined languages or insert your own version in any language you choose.
You can also add a Header to your survey, in a text format, picture, HTML etc. You can add an Intro message page or if you leave it blank, the survey will start with the first question directly. There is a place for a “Thank you” message as well, also optional.
It’s time to select the Texts which will be inserted in your survey. You can select from the predefined languages or insert your own version in any language you choose. In this tab, you can also add a Header to your survey, in a text format, picture, HTML etc. You can add an Intro message page or if you leave it blank, the survey will start with the first question directly. There is a place for a “Thank you” message too, also optional.

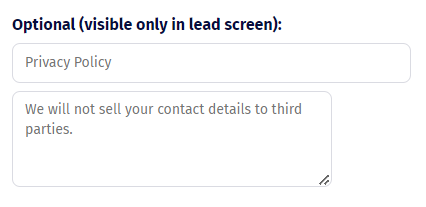
The last option on this portion is customizing the Privacy Policy, available for lead collecting, which is optional.
Step 6. Set the audience and segmentation
Now you have to choose your Audience. That means that you must Manage pages where you want to run this experiment and select the Segment (Target) of visitors you want to see the experiment.
To select the pages where you want to run the experiment you can choose from different conditions for the URL:
1. URL is: With this rule, the A/B test will run only on the exact page introduced in the value field next to the condition
2. URL is not: With this rule, the A/B test will run on all the other pages but the one introduced in
the value field next to the condition
3. URL starts with: With this condition, the A/B test will run on all the pages that have an URL
which starts with the same value as inserted in the value field
4. URL ends with: With this rule, the A/B test will run on all the pages that have an URL which ends with the
same value as inserted in the value field next to the condition
5. URL contains: Using this condition the A/B test will run on all the pages that contain in their
URL the same value as the one inserted in the value field
6. URL does not contain: Using this condition the A/B test will run on all the pages that do not
contain in their URL the value entered in the value field
7. URL RegEx: Using this you can define with RegEx the pages where you want the A/B test to
run
8. Page contains keyword: With this, the A/B test will run only on the pages that contain the
keyword or keywords in a small sentence/grouped format
This is an example of a product description
This is an awesome product with awesome features at half of the price of other providers.
Correct keyword to use: awesome product Not correct keyword to use: awesome providers
If you don’t have a large amount of traffic on your website, we recommend you to add multiple pages in the test. This can be done by pressing the ‘+‘ button on the right.

The same applies for Excluded URL pages, useful if you want the experiment to apply to multiple pages with few exceptions.
Good to know: In cases where the Survey is sent via email (as part of the integration with Reveal for example) and UTM parameters are used, please double check if the survey link (URL) you send in your email, is identical to the one you set here.
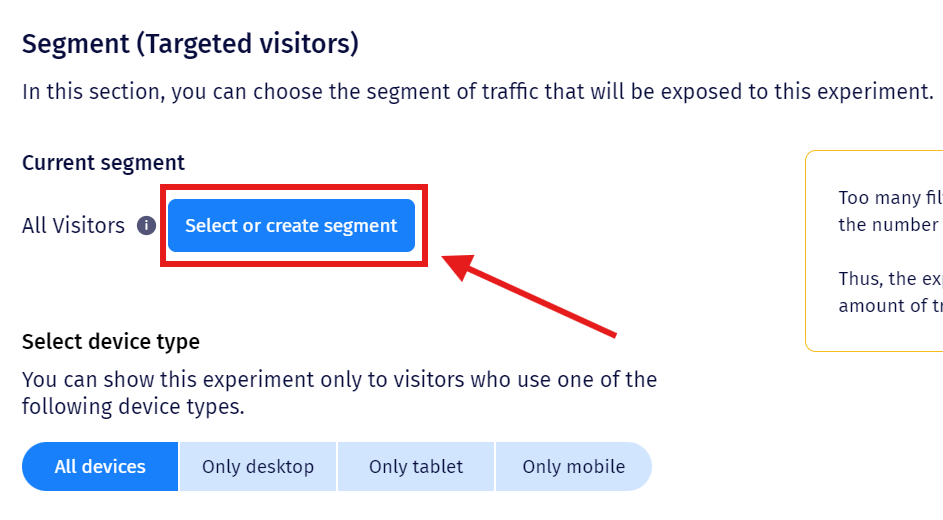
After you’ve done managing the pages where you want to run the experiment select the Segment of visitors who will be included.
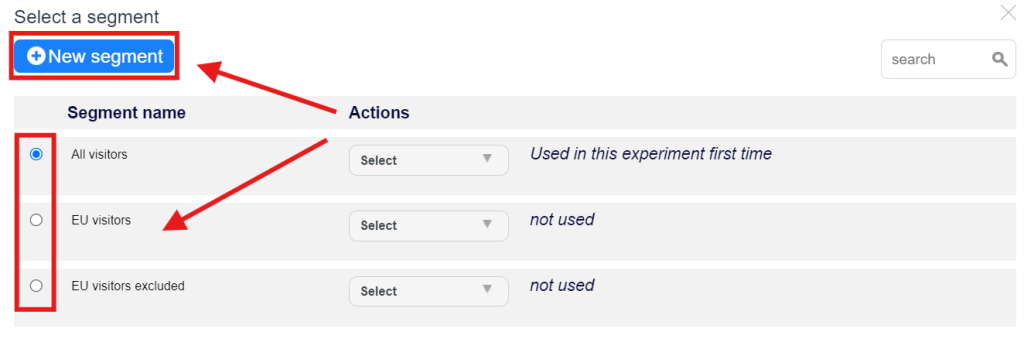
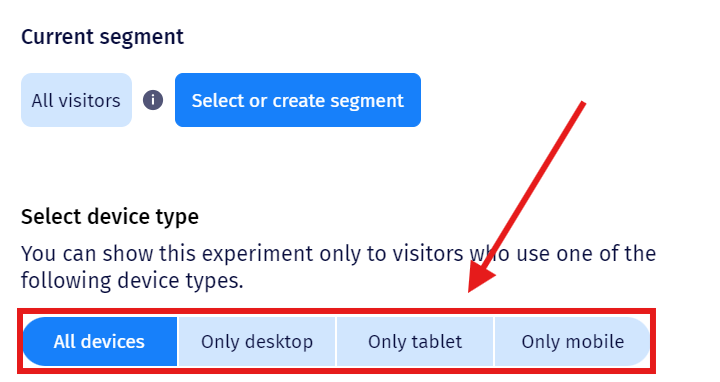
By default the experiment will be set to All visitors, just press on the Select or create segment to change it.
Here you are able to either select one of the existing segments or create a new custom.
You can also customize the segmentation by the Device type, meaning only visitors using the specified device will be able to see the experiment.
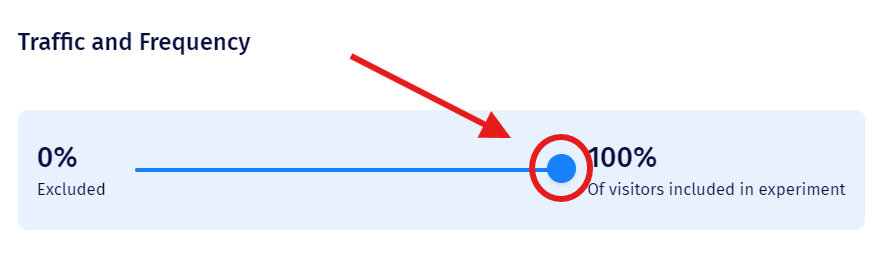
In the second part of the page, you will select the percentage of visitors that will see the experiment. This percentage will be randomly extracted from the segment you have decided to use. You can run the test on all of the visitors who are included in the segment or just a part of them (let’s say 50%).
Move the slider in order to determine the percentage of visitors from the total amount that will be included in the experiment.
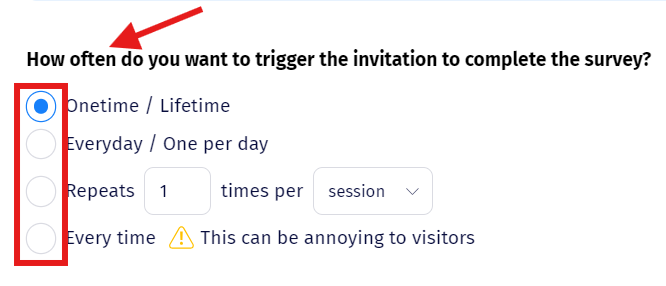
The next option for this is related to the frequency, which dictates how often the overlay can be shown to the visitors.
In this part, you can also add a Maximum number of responses (once that number is reached the survey will stop).
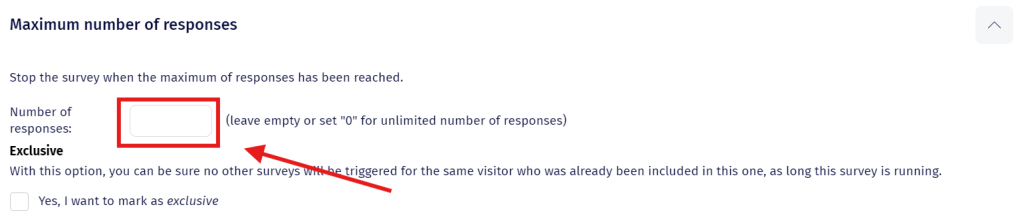
At the end you have the option to mark it as exclusive, meaning that no other experiments/surveys will be triggered for the visitors who already viewed this one, for the time it is running.

Step 7. Schedule and publish the survey
The last step of setting up a Survey is to Schedule it. Here you can select the timeframe when the experiment will take place.
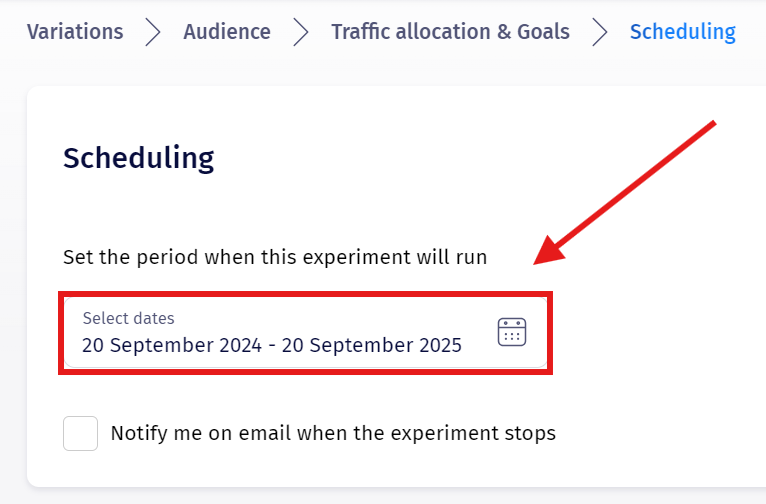
You can then check this box if you want to be notified of when the experiments ends, using either one or multiple email addresses.

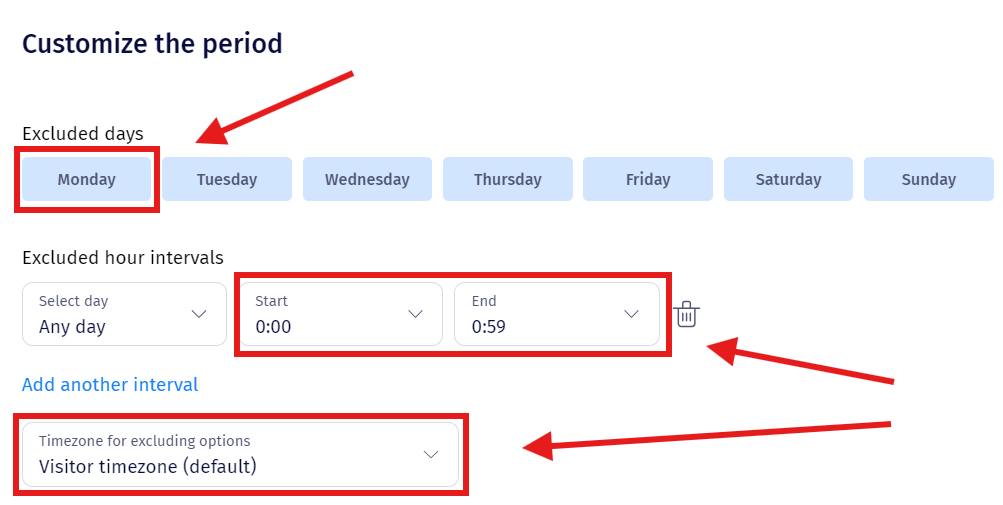
You can also set up excluded timeframes, either by selecting specific days or specific hours throughout the day. By default the Excluded hours intervals are not displayed but it will appear once you press the Add another interval button. The timezone options represents the timezone which should apply to the hour intervals you have selected previously.
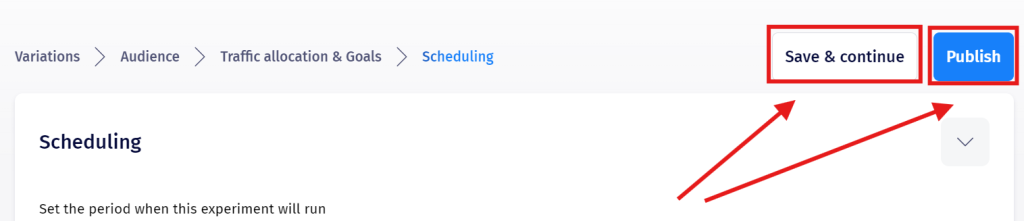
Last, but not least, Save & Continue (this will not make the survey public) or Publish the survey.
That’s it! You’re ready to start collecting survey data!
DON’T FORGET: After each modification, made you have to wait 3-4 minutes until it will be visible in the front end.