Using Omniconvert to collect data from the Checkout page will require the creation of a custom pixel, but making one is simple.
Step 1. Custom Events
Go to Settings, and select the Customer events option. From here press on the Add custom pixel button.
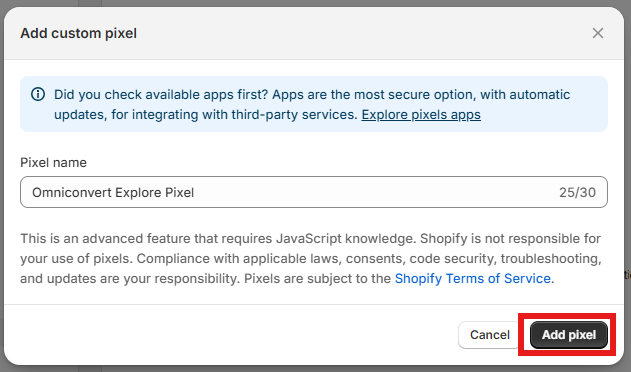
Step 2. Add Pixel
Choose a name for the custom pixel. In this case, we will go with Omniconvert Explore Pixel. Then press the Add pixel button.
Step 3. Customer Privacy
Set up your customer privacy. The recommended Customer Privacy Settings of the pixel are:
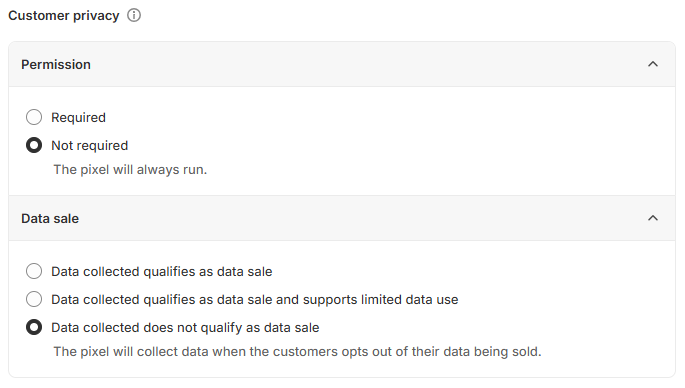
If the laws of the country of the ecommerce’s residence allows it, we recommend to have the Not required value for the Permission box, otherwise any of the other values can be used, but we won’t be able to track sales for users who do not grant us permission.
It is recommended to check the box labeled Data collected does not qualify as a data sale in the Data Sale section.
Step 4.1 For Single-currency stores
If your store has a single currency, just copy the following code and paste it into your pixel and replace {YOUR_ID} with your website’s unique identifier from the Explore Dashboard.
const push = function (event, tries) {
    if (tries === 0) {return;}
    try {
        _mktz.push(['_Goal', 'sale', event.data?.checkout?.totalPrice?.amount, {transaction: event.data?.checkout?.order?.id}]);
    } catch (e) {
        setTimeout(push, 500, [event, tries - 1]);
    }
}
analytics.subscribe("checkout_completed", (event) => {
    window._mktz=window._mktz||[];
    const mktzScript = document.createElement('script');
    mktzScript.setAttribute('src', 'https://cdn.omniconvert.com/js/{YOUR_ID}.js?pixelMode=1');
    mktzScript.async = false;
    document.head.appendChild(mktzScript);

    push(event, 20);
});
In order to retrieve your website’s unique identifier go to the Explore Dashboard and by pressing on your website to open the dropdown, select Tracking code settings.
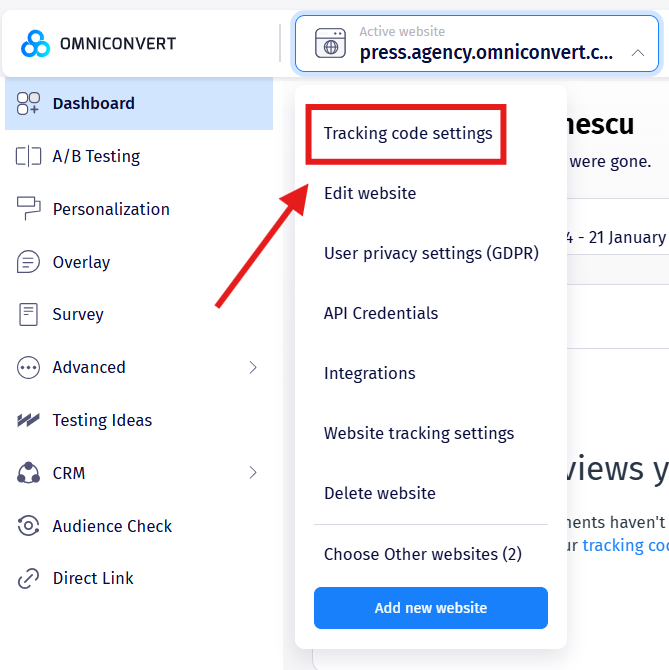
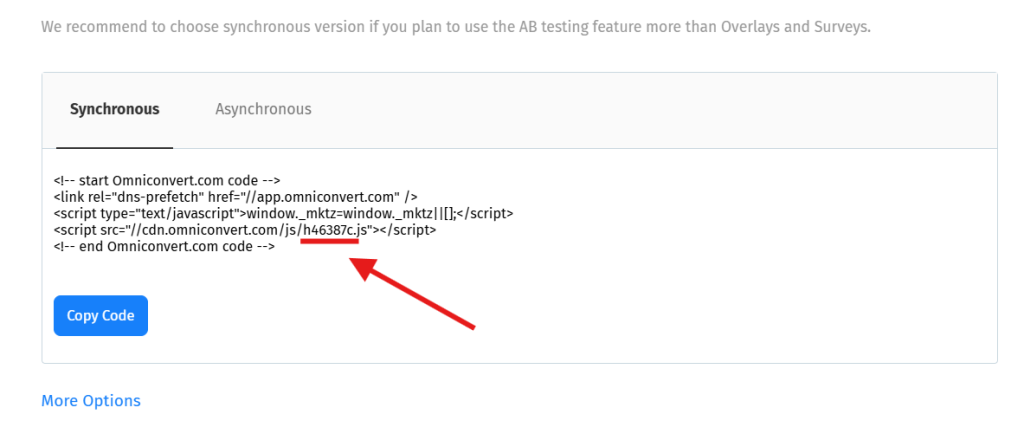
Here you will find the unique identifier which correlates to your website.
Step 4.2 For Multi-currency stores
If your store has a multiple currencies, that means you will need Multi-currency support for Sale Goal. This will convert all of the transaction in your Base Currency, decided when you added your website into your Explore account.
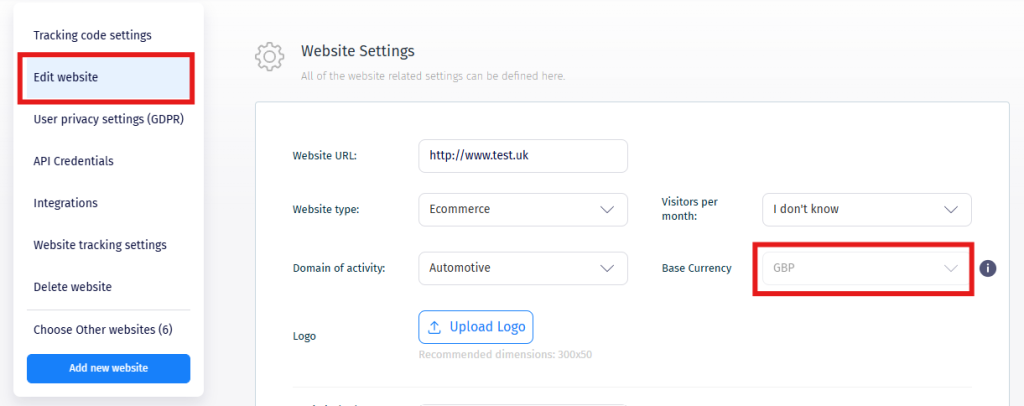
You can see what Base Currency you’ve set up by going to Edit website page. Changing it needs to be done from our end, so please contact us if you require the Base Currency changed.
Then, copy this code and paste it into your pixel and replace USD with your Base Currency and HERE_ADD_TRACKING_ID with your website’s unique identifier from the Explore Dashboard.
/* Omniconvert - Tracking script and Sale Goal integration for the Thank You page */
const push = function (event, tries) {
    if (tries === 0) {return;}
    const currencyCode = event.data?.checkout?.totalPrice?.currencyCode || "USD";
    try {
        const transactionData = { transaction: event.data?.checkout?.order?.id, skus: event.omniSkus, currency: currencyCode};
        _mktz.push(['_Goal', 'sale', event.data?.checkout?.totalPrice?.amount, transactionData]);
    } catch (e) {
        setTimeout(push, 500, [event, tries - 1]);
    }
};
analytics.subscribe("checkout_completed", (event) => {
    window._mktz=window._mktz||[];
    const omniTrackingId = 'HERE_ADD_TRACKING_ID';
    const mktzScript = document.createElement('script');
    mktzScript.setAttribute('src', `https://cdn.omniconvert.com/js/${omniTrackingId}.js?pixelMode=1`);
    document.head.appendChild(mktzScript);
    event.omniSkus = event?.data?.checkout?.lineItems?.map(item => item.variant?.sku).filter(sku => sku) || [];
    push(event, 20);
});
For the tracking code, make sure to keep the quotation marks, for example:
const omniTrackingId = ‘q7ce854’;
In order to retrieve your website’s unique identifier go to the Explore Dashboard and by pressing on your website to open the dropdown, select Tracking code settings.
Here you will find the unique identifier which correlates to your website.
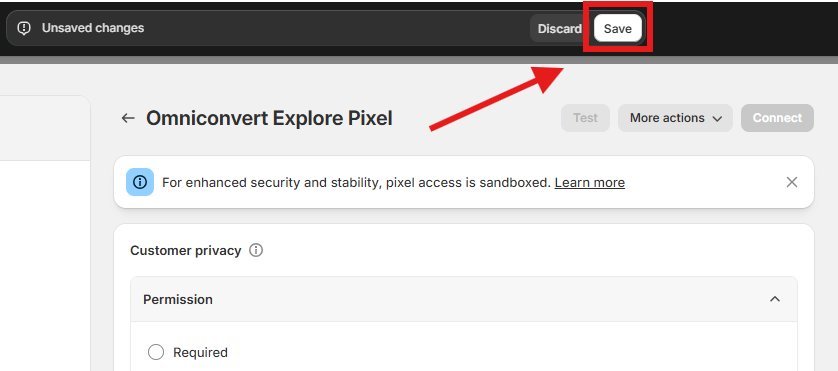
Step 5. Save Pixel
Once you inserted the code which contains your website’s identifier, you need to press the Save button first, otherwise you will be unable to connect your custom pixel.
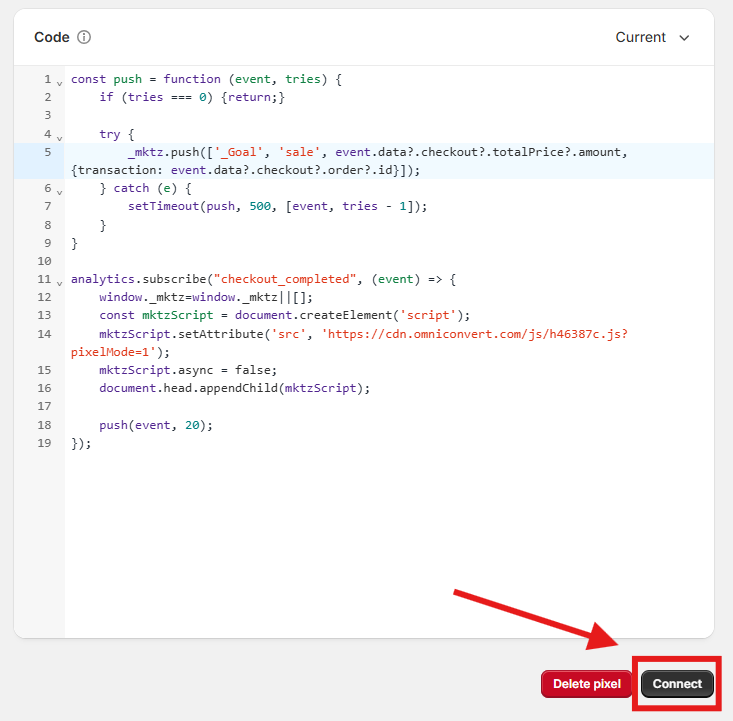
Step 6. Connect Pixel
Then press the Connect button at the bottom of the page. The pixel needs to be connected, otherwise your sale events won’t be sent to Explore.
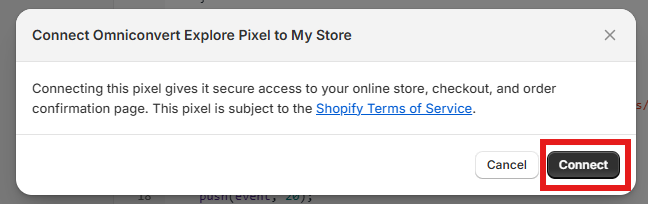
A pop up will open where you will have to confirm your action. Press Connect again and that is all, your custom pixel is set up.
Please make sure to use your own website unique identifier, not the one from the examples above, as using the example will lead to your custom pixel not working.