
Track Sales on Shopify (Custom Pixel)
Overview
If your Shopify store uses Checkout Extensibility - the default for all new Shopify stores, and required for Shopify Plus - you need a Custom Pixel to accurately track Sale goal conversions. It's simple to set up.
Step 1 - Add a custom pixel
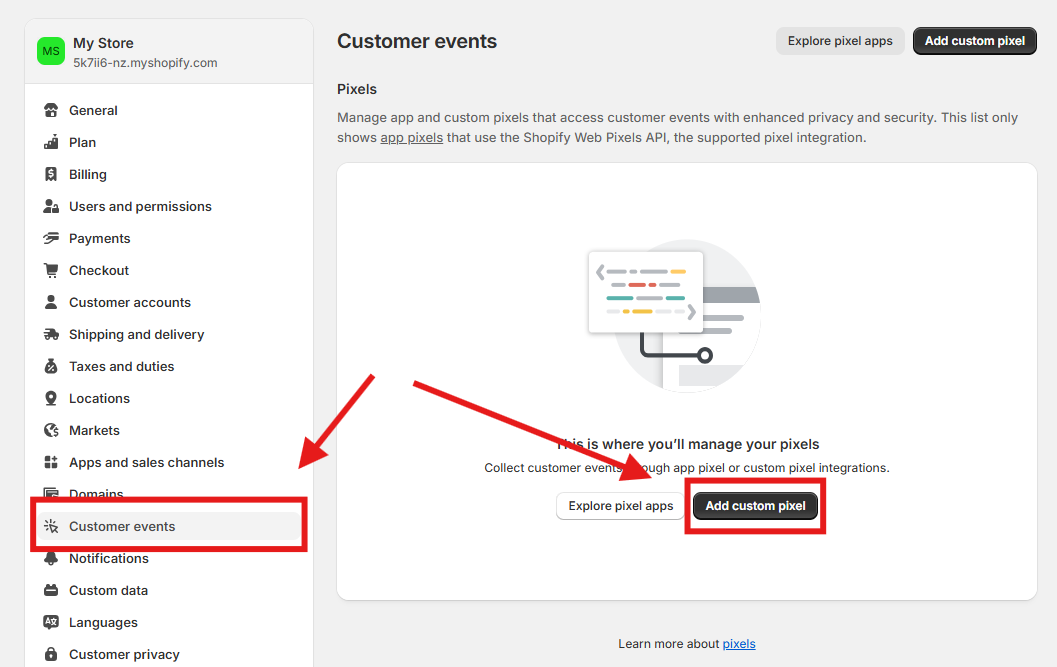
In your Shopify admin, go to Settings → Customer events, then press Add custom pixel.
Step 2 - Name it
Give the pixel a name - for example, Omniconvert Explore Pixel - then press Add pixel.
Step 3 - Customer Privacy settings
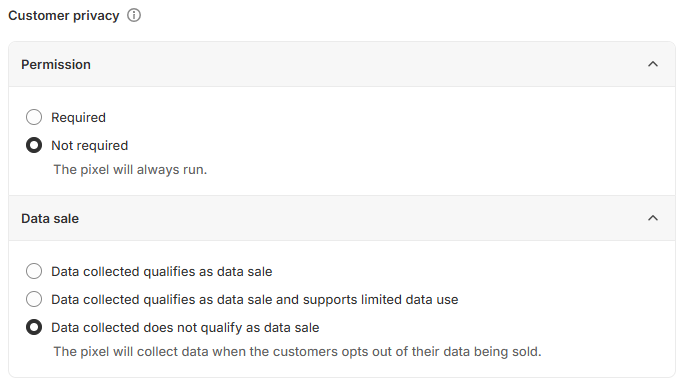
Recommended settings:
-
Permission - set to Not required, if the laws in your ecommerce's country of residence allow it. Otherwise, use another value - but be aware sales won't be tracked for visitors who don't grant permission.
-
Data Sale - check Data collected does not qualify as a data sale.
Step 4 - Add your tracking code
Find your website's unique identifier first: go to the Explore Dashboard, click your website name to open the dropdown, and select Tracking code settings - your ID is shown there.
Single-currency stores
Copy this code into your pixel, replacing {YOUR_ID} with your identifier:
const push = function (event, tries) {
    if (tries === 0) {return;}

    try {
        _mktz.push(['_Goal', 'sale', event.data?.checkout?.totalPrice?.amount, {transaction: event.data?.checkout?.order?.id}]);
    } catch (e) {
        setTimeout(push, 500, event, tries - 1);
    }
}

analytics.subscribe("checkout_completed", (event) => {
    window._mktz=window._mktz||[];
    const mktzScript = document.createElement('script');
    mktzScript.setAttribute('src', 'https://cdn.omniconvert.com/js/{YOUR_ID}.js?pixelMode=1');
    mktzScript.async = false;
    document.head.appendChild(mktzScript);

    push(event, 20);
});
Multi-currency stores
If your store sells in multiple currencies, you need multi-currency support - Explore converts every transaction into your Base Currency, set when you first added your website. Check yours under Edit Website; changing it requires contacting Omniconvert support.
Copy this code into your pixel, replacing USD with your Base Currency and HERE_ADD_TRACKING_ID with your website's identifier:
/* Omniconvert - Tracking script and Sale Goal integration for the Thank You page */
const push = function (event, tries) {
    if (tries === 0) {return;}
    const currencyCode = event.data?.checkout?.totalPrice?.currencyCode || "USD";
    try {
        const transactionData = { transaction: event.data?.checkout?.order?.id, skus: event.omniSkus, currency: currencyCode};
        _mktz.push(['_Goal', 'sale', event.data?.checkout?.totalPrice?.amount, transactionData]);
    } catch (e) {
        setTimeout(push, 500, event, tries - 1);
    }
};
analytics.subscribe("checkout_completed", (event) => {
    window._mktz=window._mktz||[];
    const omniTrackingId = 'HERE_ADD_TRACKING_ID';
    const mktzScript = document.createElement('script');
    mktzScript.setAttribute('src', `https://cdn.omniconvert.com/js/${omniTrackingId}.js?pixelMode=1`);
    document.head.appendChild(mktzScript);

    event.omniSkus = event?.data?.checkout?.lineItems?.map(item => item.variant?.sku).filter(sku => sku) || [];
    push(event, 20);
});
Use your own website's unique identifier - copying the example ID as-is will result in a pixel that doesn't work.
Keep the quotation marks around your tracking ID exactly as shown, e.g. const omniTrackingId = 'q7ce854';.
Step 5 - Save the pixel
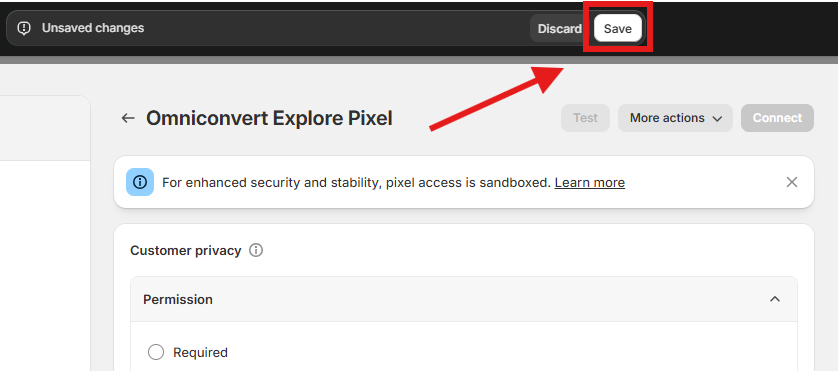
Press Save after adding your code. You won't be able to connect the pixel until it's saved.
Step 6 - Connect the pixel
Press Connect at the bottom of the page, then confirm in the pop-up that appears by pressing Connect again.
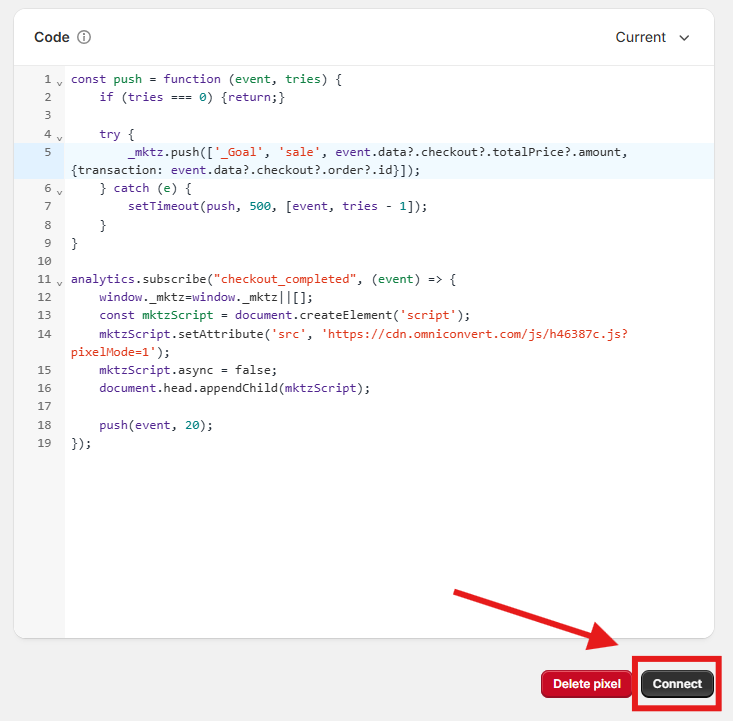
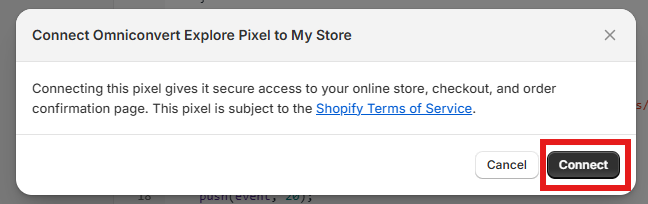
The pixel must be connected, not just saved - otherwise your sale events won't reach Explore at all.