
Integrate with Woopra
Overview
The Woopra integration lets you see detailed data about how visitors interact with your Explore experiments, directly inside Woopra.
Make sure the Woopra tracking code is already installed on your website.
Enabling the integration
-
Log into your Explore account and go to Integrations.
-
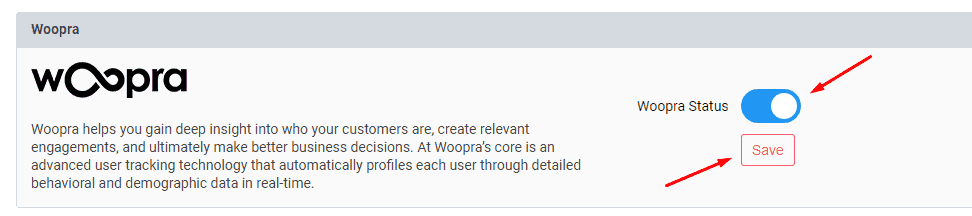
Search for Woopra, click the Status button to set it live, and press Save.
Once live, the events below start appearing in Woopra under People, usable to analyze and filter Trends, Journey, and Retention reports.
Data sent to Woopra
1. Experiment viewed
Fires for A/B tests, Personalization, or Overlays. Includes: Name (Omniconvert Experiment View), Experiment name, Experiment ID, Variation name, Variation ID.
2. Property update
Any information collected through an Overlay's Lead Collector (name, email, phone, etc.) updates the visitor's profile in Woopra.
3. Survey viewed
Includes: Name (Omniconvert Survey View), Survey name, Survey ID.
4. Surveys answered
Shows the visitor's actual responses to your survey questions.
5. Goal achieved
Fires whenever a visitor hits a goal set for one of your experiments. Includes: Name (Omniconvert goal), Goal name, Goal value (if the goal has one, like Sale), Goal transaction ID (if set), Experiment ID, Experiment name, Variation ID, Variation name.
For Engagement and Bounce Rate (unbounce) goals specifically, the value is always 0 and the transaction field is left blank, since these goals don't carry a monetary value.
Segmenting visitors using Woopra Labels
Once the integration is active, you can segment Explore visitors using labels set in Woopra.
-
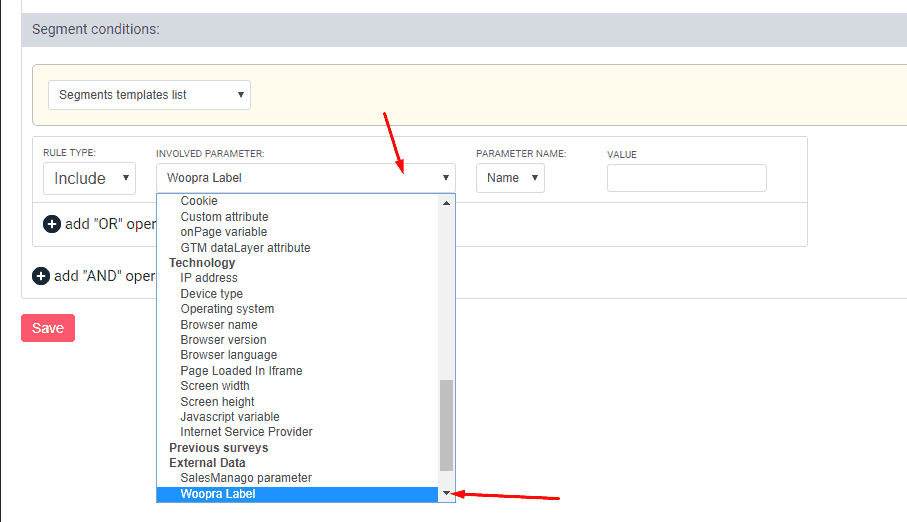
Go to Advanced → Segments and create a new segment.
-
Include or Exclude the Woopra Label parameter.
Once created, add the segment to any experiment as usual.